The highest form of bliss is living with a certain degree of folly.

|
In this video I’m fixing the problem of not having enough lights in a room. This is a break room me and my employees use when we’re at The Wood Shed. We often use this space as a computer work area and break room which is great, but it’s just too dark. 
It’s actually really simple to add lights to any space so in this video I’m going to do just that and show you the steps incase you have a room in your house that needs the same. Things I Used in This Project:
The first thing to do is locate the joist and figure out which way they are running. You basically want to know where the joists are so that you can avoid them. 
What I did to figure out my light layout is first decide how many lights I wanted in the space. Then I measured the length of the ceiling space and divided it into equal parts for the number of lights. For my space, I wanted two rows of four lights and my ceiling is 274” long. That means I’ll have a light every 55”. 
You can do the same math for dictating the placement of the rows however, I placed these by eye instead. I have a ceiling fan in the center of the room so I picked a placement by eye then matched that measurement on the other side. Now you can very well just go through the ceiling and make a bunch of pencil marks. However, I instead used rows of painters tape to make a quick visual guide. It goes up and down quickly and also is very easy to see. 
At this point, I went to each light location and ran a screw in, just to double check that I wasn’t on any joist. If you are, then move the location one way or the other before getting going. I was all good, so next I start prepping for drilling holes. 
There is a variety of tools you can use for cutting holes in drywall but a cheap speciality tool definitely worth picking up for this one job is called a adjustable hole saw cutter. It has two teeth that rotate in a circle on a drill. It’s adjustable so you just need to match it to the size of your fixture. 
Before getting after it, I next made a dust shield. Drilling into drywall above your head is going to create a huuuuge mess. They make plastic shields but I didn’t pick one up. So instead I grabbed an old basketball and cut it in half. 
After drilling a hole in the bottom, I could poke my drill through and grab onto the hole cutting tool. Now when I cut into the ceiling most of the dust will be captured in the ball instead of going all over the house. 

However, drywall is still nasty stuff, so as you can see I’m wearing a respirator. 
Next is to determine power. You just need to find power in the area that you can join these lights to. In my case, I have an old pendant light that I want to go away so after taking it down I’ll put in a blank but use it’s wiring as my power source to then daisy chain off to each one of my new lights. 
My room is actually a room built within a bigger shell so the insulation is on the ceiling of this attic space instead of on the floor. Which makes my job here even more simple since all the bays are nice and open. 
In the attic, I located the romex from the pendent light that I just disconnected and then routed it to the furthest hole. Then I ran a separate strand of Romex from the first hole to the second, to start daisy chaining the lights. Make sure you have at least 6 – 8″ to leave yourself enough wire to work with with each light. 
For lighting I’m going with recessed disc lights. These are quickly taking the place of Can lights which use to be the old go to for jobs like this, but these are not only easier to install but also cheaper. They are LED so good efficiency, and a lot of them have adjustable color temperatures as well. Each light comes with two parts: the transformer and the light itself. 
Each light has two springs on the side to hold the lights in place. 
You can attach the transformer to the joist with the attachments here 
After running the Romex, it’s back down to the space to start stripping wire and terminating connections. 


The last thing to do is take the tape down before the fixtures go all the way in, and you’re done. 
I don’t know if it can get more simple, so if you have a dark room or area then I hope this video has given you the confidence to tackle the job of adding lighting to it. Dont forget to watch the video above to see an even more detailed tutorial. I’ll see you on my next project. If you haven’t already, don’t forget to sign up at the top of this page for my newsletter so you don’t miss new projects! (Most of the links listed above are affiliate links. As an Amazon Associate I earn from qualifying purchases. Thank you for supporting me in this way.) The post Easiest Lights Ever! Install Recessed LED’s In One Day appeared first on Wilker Do's. via Wilker Do's https://wilkerdos.com/2021/01/easiest-lights-ever-install-recessed-leds-in-one-day/?utm_source=rss&utm_medium=rss&utm_campaign=easiest-lights-ever-install-recessed-leds-in-one-day
0 Comments
In this video I’ll be showing you how I tore into a wall to create a built in cubby. I did this project in my bathroom but the same steps can be taken in any wall in order to create a beautiful storage spot. Lets get started. 
Things I Used in This Project:
The first thing to note is this wall I’m using is non load bearing. It’s just a partition wall between the bathtub and the toilet. Also since the shower is separate, I figured there was no plumbing above the tub that would be in my way. Other than a vent tube which I’ll get into later. All that to say: I recommend doing this project in a space that looks like the inside will be relatively empty. 
To get started, I first figured out where I wanted the cubby to be. I used a level to draw some lines that would put it in line with the floating shelves I built in my last video. Then I used a stud finder to locate the studs in the wall. 
The easiest thing to do would be to build a vertical cabinet in between the studs and never have to touch them. However, I wasn’t a fan of that arrangement…I really wanted something horizontal. The only problem with that is that means I would have to cut into the studs. In my situation this isn’t a problem because this wall isn’t load bearing, so I marched forward with my plan. With the placement laid out, I next cut into the drywall, which is an intimidating step to start. 
I grabbed not only a shop vac but also my ISOtunes as this is a very noise step, especially in a small space. They actually make a drywall saw that you can use for this step but since I have a multi tool, I went with that. It will drastically sped up the process. I would go over my pencil mark and score a line, just to first establish where the cut needed to be. So that next I could make another pass but deepen it until I felt the blade punch through the back. 
To keep the dust down you can see that I just dragged the shop vac along with my cut. Once it was cut all the way through on all sides, I cut the top right corner out so that I could create some sort of hand hold for pulling the piece out. 
It was here I realized my mistake….this cut was the finished cubby size I wanted, but in the next step I’ll have to add 2x4s to both the top and bottom which is shrink my hole by 3”. To fix this, I simply cut back 1 1/2” from the top and bottom. If you do this project, figure out your wanted finish size, then add 1 1/2” to both ends before making your cubby cut. : ) 

This next step you’ll be able to completely skip if you’re not working around a tub, but let me explain this PVC pipe in my wall. This is something called a vent tube which is just an empty PVC pipe that goes up to the attic, connects to the other plumbing vent tubes in the house then goes up to the roof. It’s sole purpose is to allow air into the system so plumbing can drain. I was hoping it would be tucked off to the right but since it’s right in my way, I had to either reroute it, or shorten it. I decided to shorten it. 
To still keep it’s function, I cut this pipe shorter then used a special cap called an Air Remittence valve which can be placed anywhere in the system and will still allow air into the plumbing so things are able to drain. 
Then I went up to the attic, find this one particular line and capped it off so no moisture would fall into my partition wall here. I didn’t have enough room on the front to work in this valve so I cut a small access on the backside to do this work. After attaching the valve, I placed a grate on the toilet side so it could be accessed later, then carried on the tub side with my project. 
With the plumbing removed, next I worked on cutting the studs out. I used a combination of a sawzall with a short blade on it, and a multi tool. First a sawzall to cut through the bulk of the stud, aiming to keep my tool and blade level with the drywall cut here. Then a multi tool to finish off the back 10% of the cut without getting into the drywall on the other side. It’s a little bit of a pain because of the screws going in from the drywall on the other side, but it work eventually. 
Next I cut some 2x4s to length and attached them to the studs in the wall. This is where I’m sure I’m going to get complaints. If this were a load bearing wall, I would have built a true header to go from the far left stud to the far right on both the top and bottom, but since I know the framing of my house, I knew that wasn’t needed. 
Instead, I just needed to stabilize the studs and connect them so they wouldn’t be loose and floating around in the walls, which these boards do. If you’re wondering, they don’t extend all the way to the left stud because it was another 13’ inside the drywall and I couldn’t access it with a drill. 
Ok, with that framed out, now it was time to head to the shop and start building the cubby that will fit inside it. 
I built this from the same Maple I built the floating shelves from and I started off by ripping all my needed boards at the table saw, then cutting them to length at the miter. The aim here is to build something that will sit inside the 2x4s of the walls then add trim to cover up the drywall. 
I recommend figuring out your dimension then taking off 1/4” to ensure it fits nice and easy. For example, my dry wall opening was 32 1/2” long, but I made my cabinet 32 1/4”. Then the same on the height. You can make it a little small to ensure it goes in smoothly then center it up with shims. 

Actually, before putting it in, I needed to add the back! You can go with any material of your choice here but I cut up some masonite strips in my shop then used a router to bevel both edges. This way after painting and attaching to the backside of the cabinet, it looks like paneling which just gives the cubby some texture. 

Now once I put it in place, it’s bottom is resting on the 2×4 on the bottom and I’ll screw it directly down to that once I like it’s left to right position. After getting the bottom secure, I also put in two screws on the top, making sure to push the cabinet in as I was doing so. 
And just like that I’m done. For finishing touches, I applied a bead of caulk around the trim then did some touch up paint but honestly this is a pretty quick and painless project that completely enhances this space. It not only helps finish out this entire space as far as looks go, but gives it some function as I now have a spot to store containers of items instead of them clogging up the perimeter of my tub. 

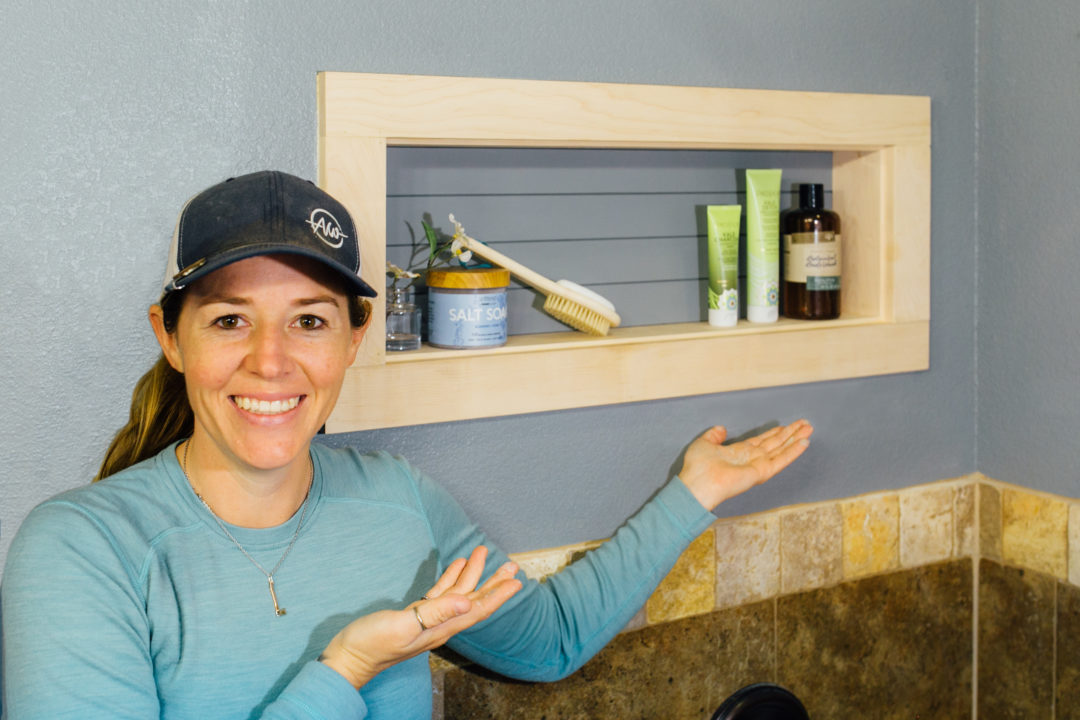
I personally love it! And now seeing how simple it was, I’m already looking at different areas in my house that could use a cubby just like it. If this is on your to do list then I hope my experience has given you an idea on what you can expect. I’ll see you on my next project. If you haven’t already, don’t forget to sign up at the top of this page for my newsletter so you don’t miss new projects! (Most of the links listed above are affiliate links. As an Amazon Associate I earn from qualifying purchases. Thank you for supporting me in this way.) The post Hidden Storage | Turn your Wall into a Cabinet! | Easy DIY appeared first on Wilker Do's. via Wilker Do's https://wilkerdos.com/2021/01/hidden-storage-turn-your-wall-into-a-cabinet-easy-diy/?utm_source=rss&utm_medium=rss&utm_campaign=hidden-storage-turn-your-wall-into-a-cabinet-easy-diy It looks like a telescoping grabber tool attached to a hat stand, but it could be the future of home robotics. Meet Stretch, the first device from Hello Robot, a startup founded by former Google director of robotics Aaron Edsinger and Georgia Tech robotics professor Charlie Kemp, that came out of stealth today after three years in development.
Stretch is not a consumer robot that’s ready to roll into your apartment and start doing the dishes, but rather a research platform that Edsinger and Kemp hope will lay the groundwork for home automation in the years to come. The bot’s lightweight and low-cost design could be a blueprint for future robots, especially those designed to help look after the elderly or people with physical disabilities, allowing companies to automate a range of household tasks the way the Roomba has automated vacuuming. Read more on: An ex-Googler’s new robot reimagines the future of home automation Related Article: The Benefits Of Home Security Monitoring Check out to Kennesaw Garage Door Repair’s blog to learn more on how to improve and protect your home. |
Social Media:
Other Blogs: Kennesaw Garage Door Repair's Blog Tumblr Medium Other Profiles: Gravatar Diigo Evernote GetPocket OneNote IFTTT About.me Instapaper Disqus Nimbusweb.me Archives
April 2023
Categories |
 RSS Feed
