The highest form of bliss is living with a certain degree of folly.

|
In this video I’m showing you how I installed plumbing, with hot and cold water, for an outdoor shower. Having a shower outdoors in the hot Texas summers feel amazing! Be sure and check out Part 1 of this project, which covers building the structure HERE Find the Outdoor Shower Plans here: https://bit.ly/3sDnE8k Check out my original video on the Outdoor Shower I built for my parents here: https://youtu.be/dT42lIspPGs How to sweat copper pipe: https://youtu.be/KmPCiCHOyVw Things I Used in This Project:

If you haven’t already, don’t forget to sign up at the top of this page for my newsletter so you don’t miss new projects! (Most of the links listed above are affiliate links. As an Amazon Associate I earn from qualifying purchases. Thank you for supporting me in this way.) The post Get Hot and Cold Water to an Outdoor Shower | Part 2 | DIY Plumbing! appeared first on Wilker Do's. via Wilker Do's https://wilkerdos.com/2021/08/get-hot-and-cold-water-to-an-outdoor-shower-part-2-diy-plumbing/?utm_source=rss&utm_medium=rss&utm_campaign=get-hot-and-cold-water-to-an-outdoor-shower-part-2-diy-plumbing
0 Comments
In this video I’m showing you how I built an outdoor shower. Having a shower, outdoors in the hot Texas summers feel amazing. In this video, I cover building the structure. Stay tuned as next week, I’ll cover how to plumb the shower with water lines from the house. Find the PLANS for this build here: https://bit.ly/3sDnE8k Watch my first Outdoor Shower build here: https://youtu.be/dT42lIspPGs Things I Used in This Project:

If you haven’t already, don’t forget to sign up at the top of this page for my newsletter so you don’t miss new projects! (Most of the links listed above are affiliate links. As an Amazon Associate I earn from qualifying purchases. Thank you for supporting me in this way.) The post How To Build An Outdoor Shower | Part 1 | DIY Framing appeared first on Wilker Do's. via Wilker Do's https://wilkerdos.com/2021/08/how-to-build-an-outdoor-shower-part-1-diy-framing/?utm_source=rss&utm_medium=rss&utm_campaign=how-to-build-an-outdoor-shower-part-1-diy-framing In this video, I’m showing you all around my CNC business at my commercial space, The Hill Country Wood Shed. We have 3 CNC machines running here and I’m showing you how they all produce different products that my business sells, as well as showing you the work flow.
Be sure to check out the video HERE. Thanks for watching! If you haven’t already, don’t forget to sign up at the top of this page for my newsletter so you don’t miss new projects! (Most of the links listed above are affiliate links. As an Amazon Associate I earn from qualifying purchases. Thank you for supporting me in this way.) The post CNC Shop Tour | My CNC Business appeared first on Wilker Do's. via Wilker Do's https://wilkerdos.com/2021/08/cnc-shop-tour-my-cnc-business/?utm_source=rss&utm_medium=rss&utm_campaign=cnc-shop-tour-my-cnc-business A step-by-step tutorial for how to hang wallpaper with an unpasted mural inside of picture frame molding for a whimsical, traditional look.With Mission: Big Girl Room underway, it’s looking extra cute around here with this sweet chinoiserie wallpaper mural! It turned out even BETTER than I imagined! (Don’t you love it when that happens?) And so far, Regan approves of her bedroom makeover. 
Back before she was born, when we were deep into prepping her nursery, we put up this picture frame molding and painted the entire room Magnolia Home True White knowing that one day, this baby girl would likely develop quite a personality when we could later add color and pattern to further express it. So yesterday, we painted the ceiling Romabio Barefoot Dance from our color collection to amp up the color component. (You can see more blush paint colors I love here.) 
And to add some pattern, a soft, elegant, whimsical chinoiserie wallpaper mural with lots of flowers, birds, and butterflies feels so fitting for her. I’ve seen a huge increasing trend lately to add wallpaper and murals inside of picture frame molding. But even though it seems to be rising in trend, it still remains a classic. So I wanted to try it here and had this one focal wall finished in about 2 hours. (Based on this wall’s measurements, our mural cost $385.) How to Wallpaper Inside Picture Frame MoldingSupplies*I used an unpasted mural, so this method will be slightly different in adhesion if you’re working with a pre-pasted or peel-and-stick wallpaper or mural. I find unpasted wallpaper to be the easiest to apply to walls but the process is more messy than peel-and-stick.
The Steps1. Wipe down the wall you will be wallpapering first with a damp sponge to remove any residues or dust from the surface. 
2. Mix your wallpaper paste in the bucket following the container’s instructions. (Mine called to be mixed with 4 liters of cold water and stirred briskly for a few minutes and left to set.) 
3. While my wallpaper paste set, I started marking the wall for the first roll of wallpaper. Use the tape measure to measure the width of your wallpaper. Then, mark that measurement on the wall with pencil from your starting point at the top of the picture frame molding rectangle. 4. Position a plumb line at the pencil measurement from the top molding and mark the bottom molding where the plumb line touches. 5. Use a level between the points to mark the starting line for the first wallpaper roll. (These steps are very important to ensure your wallpaper design is completely straight.) 
6. Measure the height of your first picture frame rectangle and add about 3 inches. 7. Measure, mark, and cut your first length of wallpaper using the measurement from Step 6. 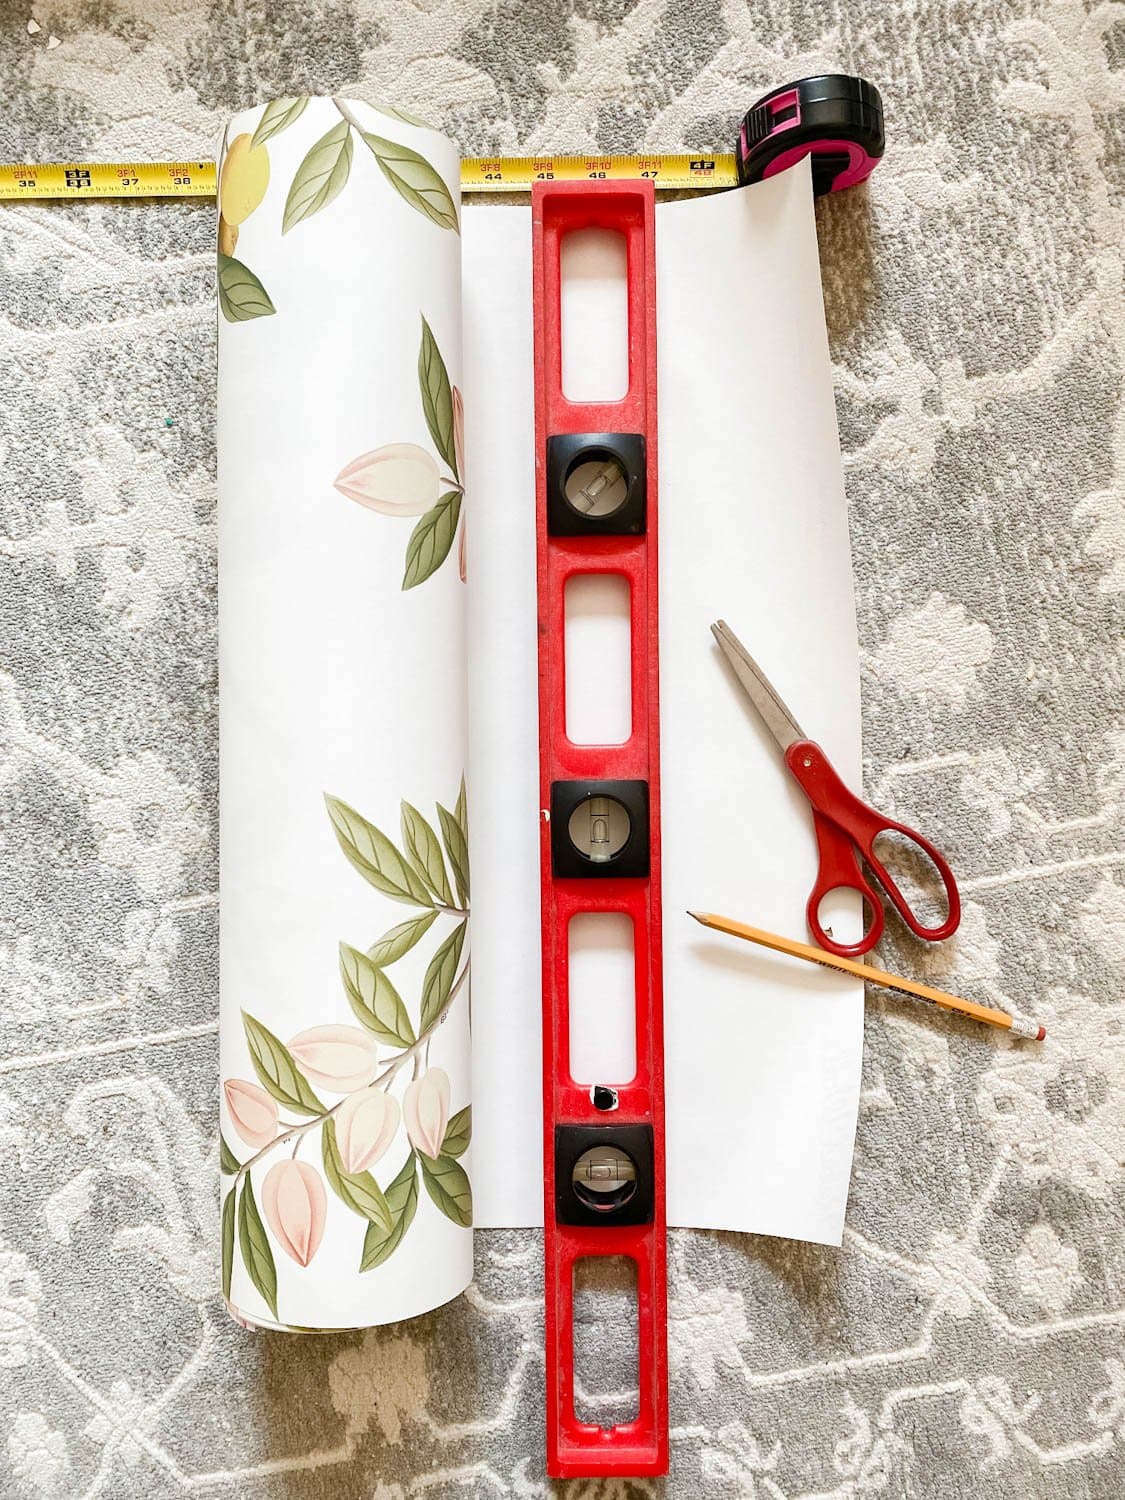
8. Use the angled paint brush to begin applying wallpaper paste directly to the wall in the corners and edges. 
9. Then, roll the paste on the rest of the surface area where you will be applying your first wallpaper strip. 
10. Line up the wallpaper strip on top of the pasted wall and press into place. The reason I like applying unpasted wallpaper vs peel-and-stick is it’s much more forgiving so that you can slide the wallpaper around on the wet wall until it’s in the position you like. 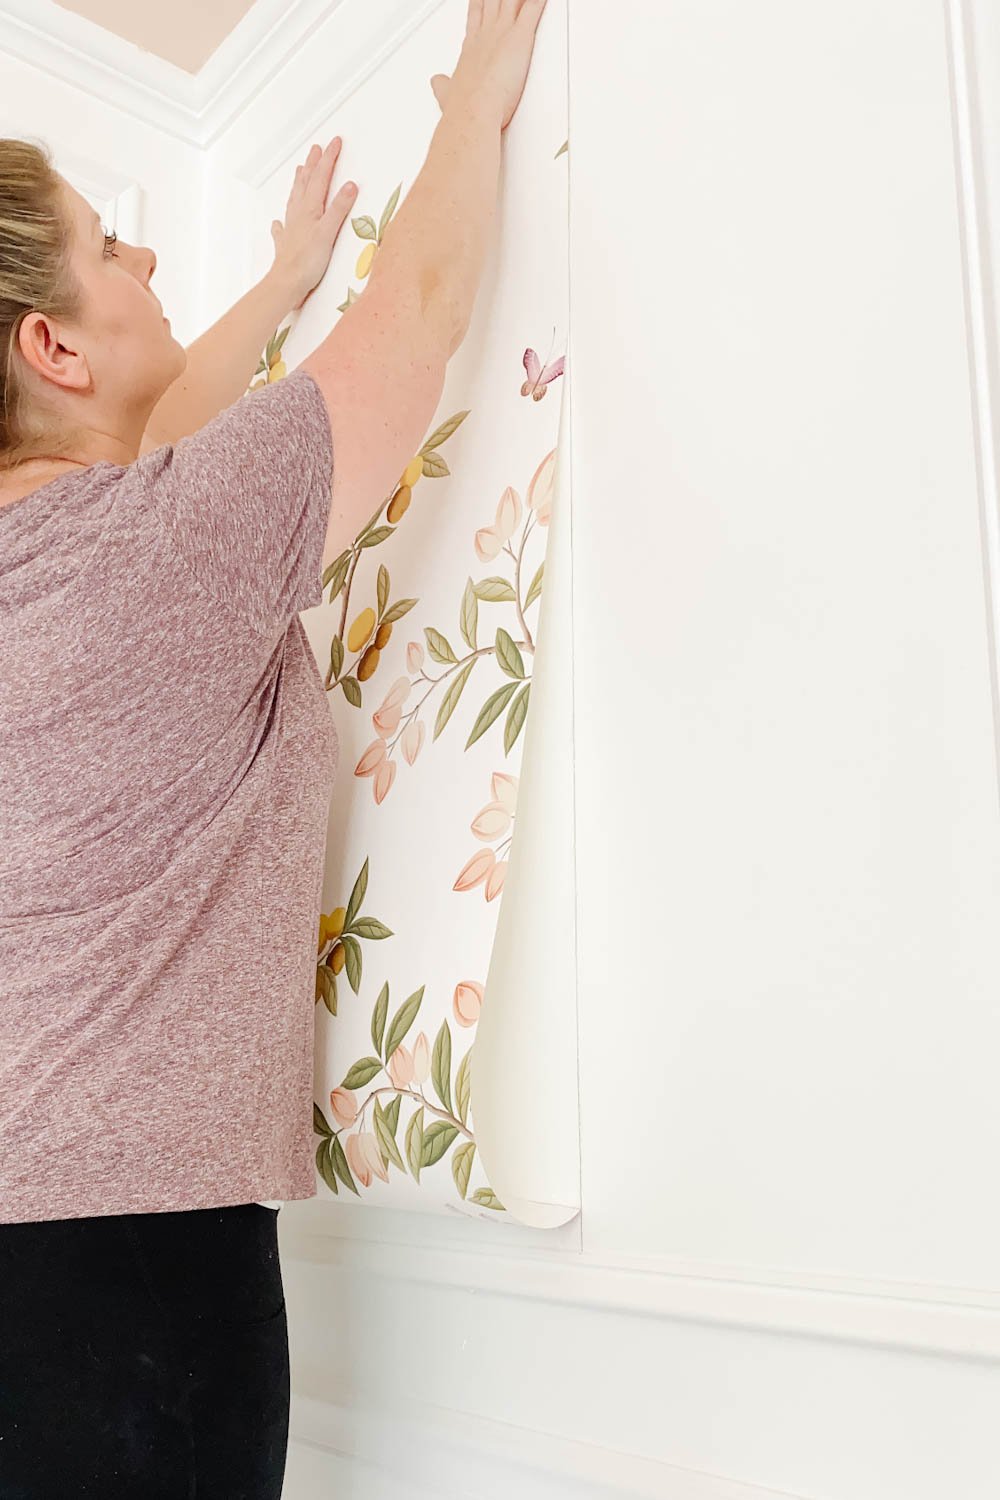
11. Smooth out any air bubbles to the edges with the wallpaper smoother. 
12. After smoothing, you should be left with a 1-2 inch overhang of wallpaper at the top and bottom edges. 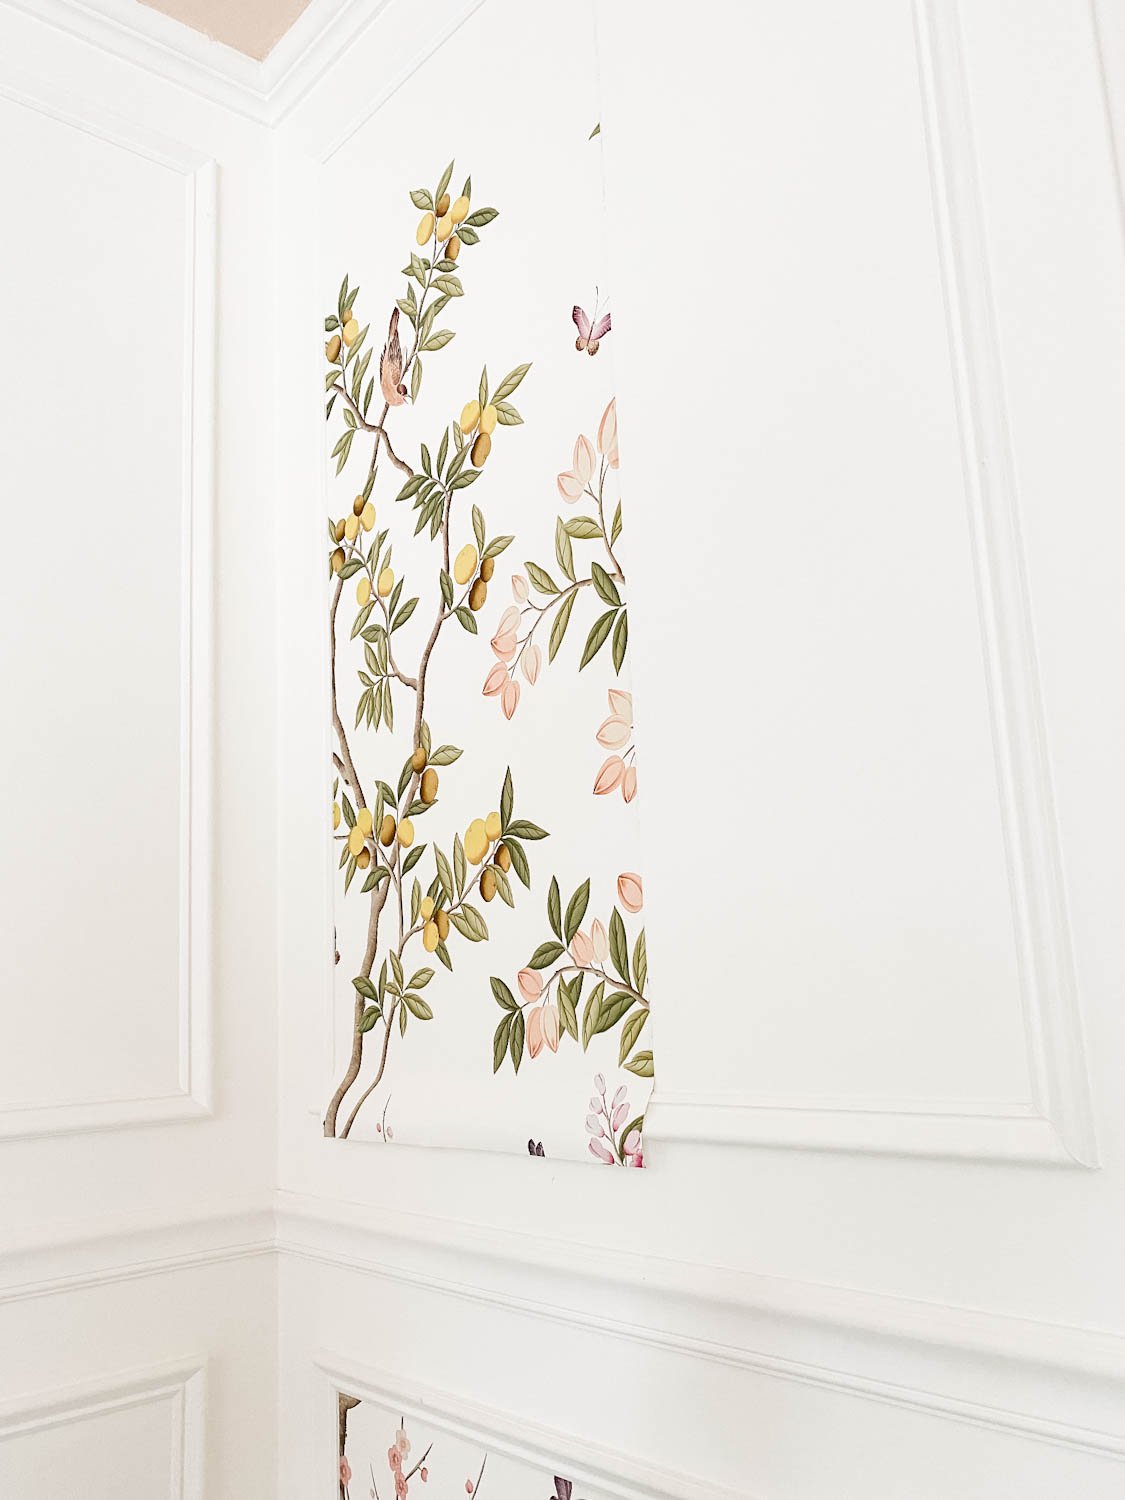
13. Using your metal edge (in my case, a trowel), press the wallpaper firmly against the edge of the molding and cut the excess with a sharp utility knife. (Change the blades often to make cutting easier with each wallpaper strip.) 
14. Use a damp sponge (I dip mine in the bowl of water and wring it out often) to wipe away any excess paste left on the wallpaper. 
15. Repeat Steps 6-14 to apply the next wallpaper strip, and be sure to do Steps 3-5 when starting each section of picture frame molding. It turned out so perfect in here! Just look at Regan’s face when she saw her new wallpaper mural. Oh, my heart! 
We have one last night in the crib and then it’s getting swapped for a big girl bed! It’s like this wallpaper mural was made for this space. I just can’t get over how much it adds to the room! 
Chinoiserie Wallpaper | Light Fixture | Crib | Crib Skirt | Rug We still have big plans to add another wallpaper mural to our dining room, so hang tight for that too. What do you think so far? Have you ever tried to hang wallpaper before? It’s one of those projects that I don’t look forward to doing at all, but once it’s done, I’m SO glad I did it. It really doesn’t take long to get the hang of how to wallpaper. Wallpapering really isn’t as scary as you might think. If you want to save this post for later, you can pin it here: 

Related Posts
Frequently Asked Questions
Can I hang wallpaper by myself?
Absolutely! Having a second set of hands is helpful, but it’s definitely possible to manage on your own. I find pre-pasted wallpaper to be the most challenging and usually in need of a helper. Pre-pasted wallpaper is heavier which poses a greater risk for tearing without someone to help.
Is it cheaper to paint or wallpaper?
Paint is definitely cheaper, and you can even try stenciling for a more budget option to get the look of wallpaper with paint. There are beautiful wallpapers out there that don’t break the bank though.
What type of wallpaper should I choose if I want a temporary solution?
Vinyl peel-and-stick wallpaper is best if you want the flexibility to remove it without any mess or damage later.
The post How to Wallpaper Inside Picture Frame Molding appeared first on Bless'er House. via Bless'er House https://www.blesserhouse.com/how-to-wallpaper-inside-picture-frame-molding/ This post is sponsored by Alexander James Tile Studio. The pros and cons of marble tile against marble effect tile and how to know which is best for your kitchen or bathroom remodel.The great debate between marble tile and marble effect porcelain tile is heated around here. Okay, not really. 
The debate is just between two voices in my brain apparently. Robert has reached the point of, “Babe, pick whatever. I’ll be happy with either one.” Man, pick a side, dang it! No, I’m kidding. Making the decision just puts us that much closer to making magic happen in this bathroom remodel plan. 
Turns out choosing between marble and porcelain tile is rather complicated in a bathroom remodel. But nerdy me jumped down a rabbit hole to do some research on the matter to bust out the good ol’ pros / cons list… Rory Gilmore style. (If you get that reference, I love you.) I ordered a ton of different marble tiles and marble look porcelain tiles from Alexander James so that I could see and feel all of the options in person. 
Semi-Polished Calacatta Porcelain | Matte Calacatta Porcelain | Polished Carrara Porcelain | Polished Calacatta Gold Bettogli | Honed Calacatta Marble | Polished Carrara Marble | Honed Carrara Marble If you’re ever in the same debate, maybe this breakdown will help. Marble Tiles vs Marble Effect Tiles: How to Choose Which is Best for You
Marble TilesPros:
Cons:
Marble Look Porcelain TilePros:
Cons:
Polished Marble vs. Honed Marble
Polished Marble TilesPros:
Cons:
Honed Marble TilesPros:
Cons:
Warm Toned Tile vs Cool Toned Tile
Warm Toned Tile:
Cool Toned Tile:
Hashing out this huge list helped me hopefully as much as it helped some of you if you’re up against a bathroom remodel too. I cannot wait to see this vision come to life. 
Which one do you think we decided to use? I’m crossing fingers and toes that we’ll be installing it in the next couple of weeks!
The post Marble Tile vs Marble Effect Tile: Which Is Best? appeared first on Bless'er House. via Bless'er House https://www.blesserhouse.com/marble-tile-vs-marble-effect-tile-which-is-best/ In this video I’m showing you how I made a 3D wall art mountain scene for my house using wood and paint. The top half is made of 3D wooden pieces and the bottom is a painted reflection. This is a wonderful DIY idea for a wall in your home or office! 
Things I Used in This Project:
Check out other mountain wall art scenes I’ve done here: https://youtu.be/6X5f-FWYRww and here https://youtu.be/Ar0ffVYl3yQ 
If you haven’t already, don’t forget to sign up at the top of this page for my newsletter so you don’t miss new projects! (Most of the links listed above are affiliate links. As an Amazon Associate I earn from qualifying purchases. Thank you for supporting me in this way.) The post DIY Accent Wall Art | How To Make 3D Painted Wood Mountain Wall Art appeared first on Wilker Do's. via Wilker Do's https://wilkerdos.com/2021/08/diy-accent-wall-art-how-to-make-3d-painted-wood-mountain-wall-art/?utm_source=rss&utm_medium=rss&utm_campaign=diy-accent-wall-art-how-to-make-3d-painted-wood-mountain-wall-art Protected: Get Better Wifi In Your Workshop! How To Add Wifi To Your Shop Garage or Outdoor Space8/3/2021 The post Protected: Get Better Wifi In Your Workshop! How To Add Wifi To Your Shop, Garage or Outdoor Space appeared first on Wilker Do's. via Wilker Do's https://wilkerdos.com/2021/08/get-better-wifi-in-your-workshop-how-to-add-wifi-to-your-shop-garage-or-outdoor-space/?utm_source=rss&utm_medium=rss&utm_campaign=get-better-wifi-in-your-workshop-how-to-add-wifi-to-your-shop-garage-or-outdoor-space |
Social Media:
Other Blogs: Kennesaw Garage Door Repair's Blog Tumblr Medium Other Profiles: Gravatar Diigo Evernote GetPocket OneNote IFTTT About.me Instapaper Disqus Nimbusweb.me Archives
April 2023
Categories |

 RSS Feed
