The highest form of bliss is living with a certain degree of folly.

|
In this video, I’m going to show you how I built this herb planter! Outside of finish, it only takes a few hours. So if this is on your to-do list, check out the video above and jump into the steps. Planter Plans and Templates: https://bit.ly/3QyEbpR Things I Used in This Project:
If you haven’t already, don’t forget to sign up at the top of this page for my newsletter so you don’t miss new projects! (Most of the links listed above are affiliate links. As an Amazon Associate I earn from qualifying purchases. Thank you for supporting me in this way.) The post Easy DIY Planter for Herbs, Flowers or Vegetables appeared first on Wilker Do's. via Wilker Do's https://wilkerdos.com/2022/06/easy-diy-planter-for-herbs-flowers-or-vegetables
0 Comments
How to transform your glass front cabinets, furniture, shower doors, windows, and glass interior doors using decorative glass window film. 
Our house has a secret weapon in terms of hiding clutter behind French doors, glass closet doors, and cabinets, and I only just now realized it: decorative glass window film. What is Decorative Window Film?These self-adhering films come in a variety of patterns, shades, and textures, and they’re a beautiful budget-friendly way to turn plain glass into a work of art all around the home. If you ever want to add charm to a builder basic house, decorative window films can make any glass surface look like a historical antique piece. It’s so much cheaper than using real specialty glass and much more DIY-friendly! Plus, it’s removable if your style changes later. Seriously. I’ve used window film a lot, around here (because let’s just say… I have a lot of “Monica Closet” situations at all times that nobody wants to see… our office gets scary sometimes and it has no business being in plain sight of guests walking through our front door). But this week, after finally replacing the broken glass cabinet fronts in our kitchen with this reeded glass, I remembered again why decorative glass window film is so stinkin’ good! 
Where to Use Decorative Window Film Around the HouseThe biggest reason it’s so functional is because window film is great at concealing clutter or improving privacy behind clear glass doors, cabinets, and windows. If you have plain glass front cabinets in your kitchen but don’t like being able to see the items inside of the cabinet, just cover the glass with film. It’s perfect for applying to a glass front door or a clear glass shower door when you need privacy. And since it comes in many patterns and textures, it creates opportunity for a beautiful design feature in a room. You can use decorative window film on:

How to Apply Decorative Window Film to GlassSupplies
Steps to Apply Window FilmStep 1 – Measure and CutMeasure the dimensions of the glass portion on the cabinet or door with the tape measure. Cut out the decorative film with scissors using those dimensions + add 4″. This will give you a little excess to cut away in the film installation process. 
Step 2 – Clean GlassThoroughly clean the glass surface with glass cleaner and let dry. Step 3 – Spray Window Film with WaterRoll out the window film on a flat, clean surface and spritz the backside completely with water. 
Step 4 – Spray Glass Surface with WaterSpritz the glass surface with water as well. Step 5 – Press Film to GlassPlace the backside of the saturated window film to the saturated glass. Press it into place so that 1-2″ of excess film hangs off all edges of the glass surface. 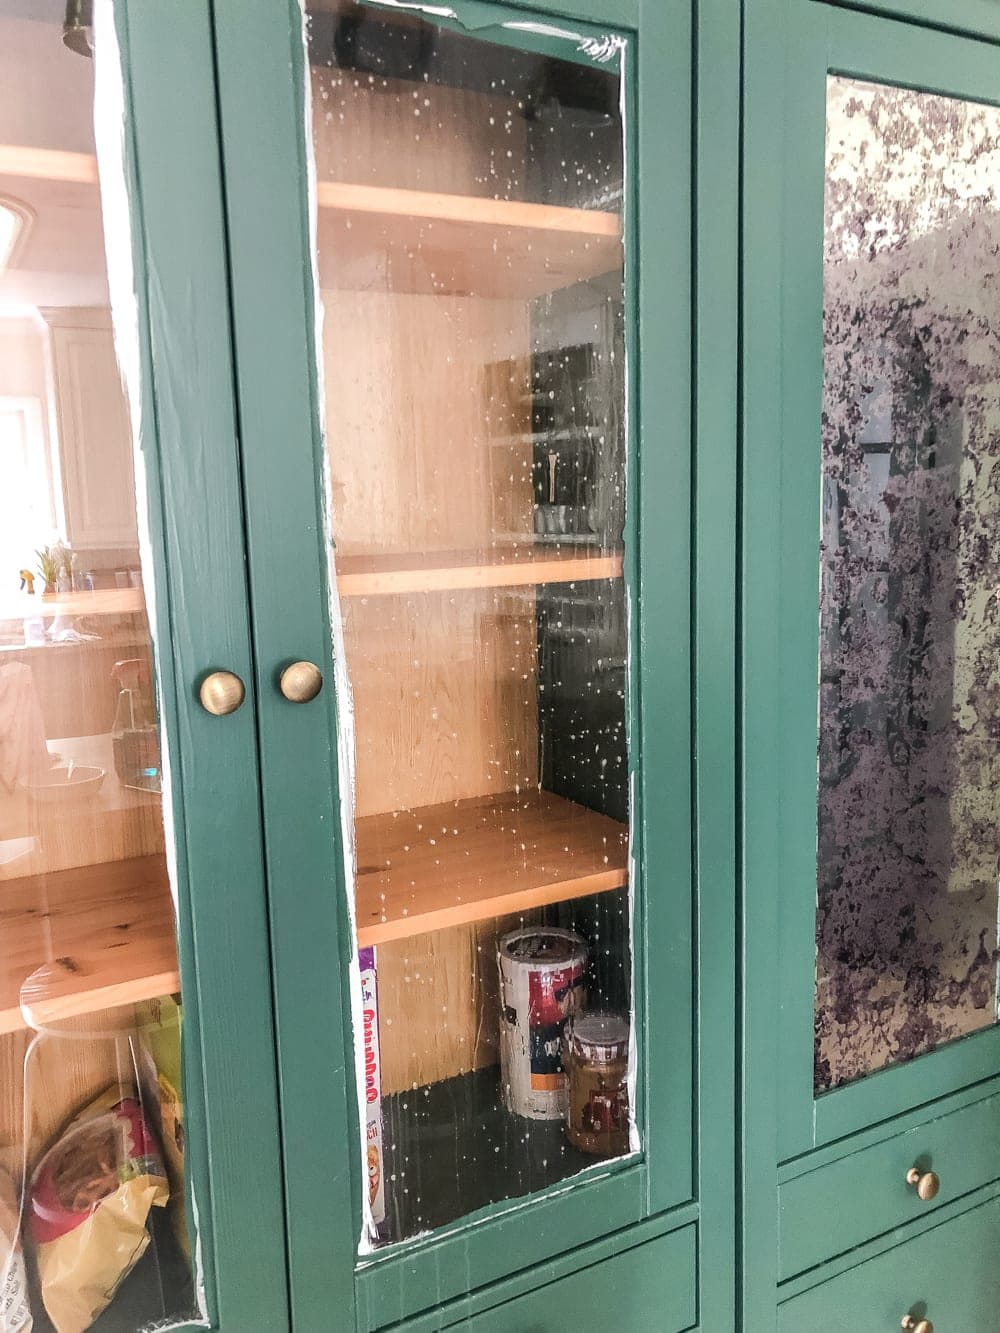
Step 6 – Press Out Air BubblesUse a squeegee or old credit card to smooth out any air bubbles and press film edges into the sides and corners of the glass. Step 7 – Trim Excess FilmUsing the edge of the squeegee or credit card, press firmly into the glass edges and run a utility knife blade alongside the glass edge to remove any excess film. 
Step 8 – Prick Air Bubbles and Let DryIf you have any air bubbles still underneath the window film, prick them with a safety pin to release the air and smooth it out. Let the wet glass fully dry before touching it so prevent any shifting. That’s it! I’ve used this stuff EVERYWHERE and it has never failed me. Antique Mirror Glass Window FilmThis antique mirror glass film was perfect for using on our IKEA pantry cabinet for obscuring our food storage. 
I used it on our French bifold doors for our bedroom closets too. I love how beautifully it bounces the light in here! 
Frosted Window FilmI added this frosted window film to our French doors in our home office and our foyer to help our dark entryway still feel slightly open with natural light while obscuring my often messy office work from visitors. 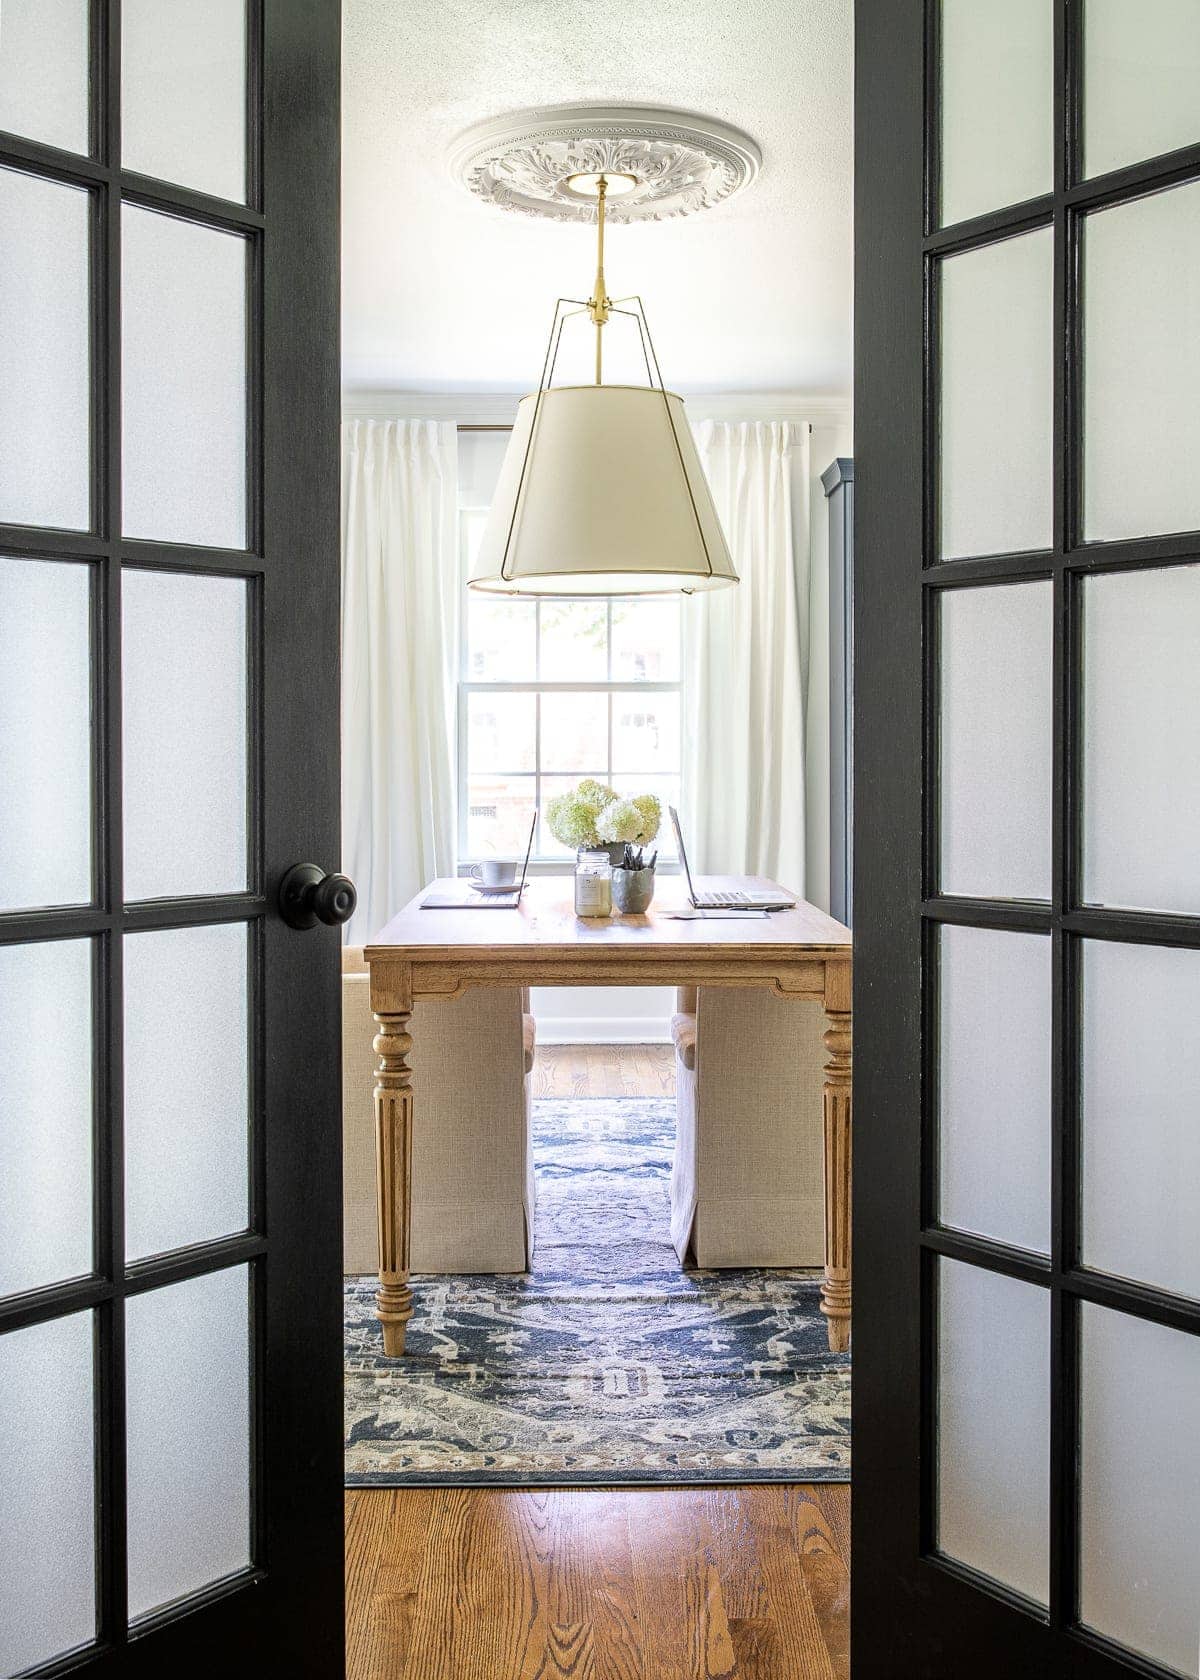

Frosted window film works perfectly for hiding cleaning supplies and piled up hampers in our laundry room too! 
And for concealing extra decor and craft supplies in our office closets, I added more frosted window film to our bifold doors we turned into skinny French doors. 
Reeded Glass FilmNow that we’ve replace the broken leaded glass in our kitchen cabinets, I LOVE how this reeded glass film adds a slightly Art Deco / Mid Century Modern vibe in this space. I can’t wait to show y’all more of it!
Vintage Style Decorative Window Film IdeasI rounded up a few of my favorite window film designs alongside some of the ones we’ve used in our own home. I’m dying to use this black lattice film on a window somewhere! Maybe in the living room? My wheels are turning over here just itching to find a place for it! 
Leaded Glass Film | Antique Mirror Glass | Frosted Window Film | Black Lattice Film | Reeded Glass Film | Etched Floral Glass | Deco Etched Glass | Stained Glass Film More Decorative Glass Ideas

The post Window Film Ideas to Create Decorative Glass Around Your Home for Less appeared first on Bless'er House. via Home Improvement Ideas for All Skill Levels https://www.blesserhouse.com/window-film-ideas-to-create-decorative-glass-around-your-home-for-less/ Tutorial: How to use lattice strips as an easy, inexpensive alternative to install a DIY batten wall for adding vintage character to plain walls. Lattice strips are the MVP of this DIY batten wall project! I mean they really are the unsung hero of a lot of little DIYs and crafts around here. (Remember that shower curtain art we framed with lattice strips a while back?) This time it needed a spotlight in the breakfast nook. 
Since we kind of have an addiction to intricate wall molding around here, it’s absolutely no surprise at all that after we finished installing and painting our Facebook Marketplace banquette find in the breakfast nook, Robert and I looked at each other and said, “Something’s missing.” Those smooth walls needed character! And lattice could do the job inexpensively. Because molding is one of my favorite ways to make a house look luxurious. 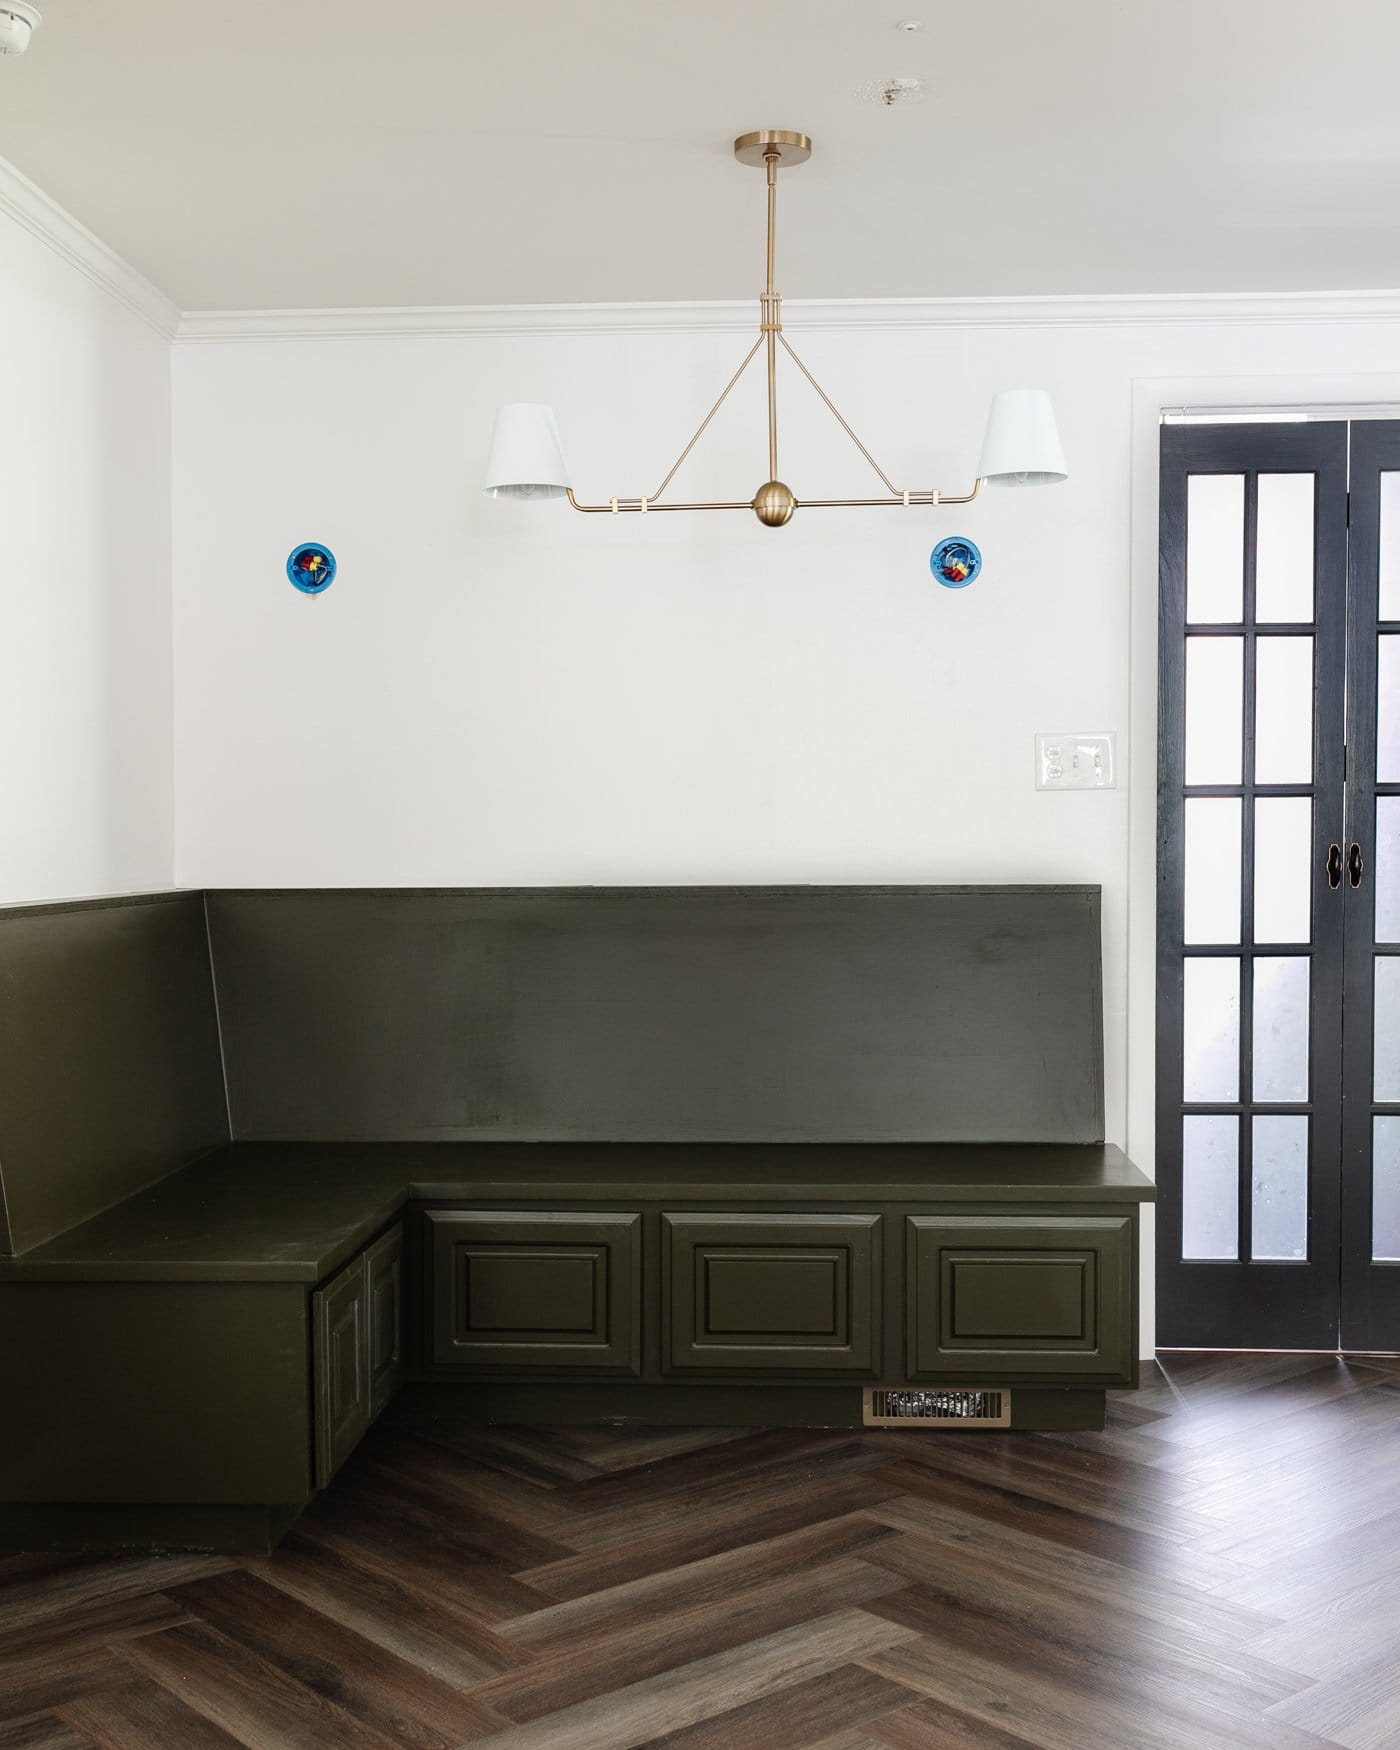
What is Lattice?Lattice is made of thin strips of wood most commonly used in a criss-cross structure for trellises to support climbing plants in gardens or to serve as porch skirting. But it’s perfect for simple wall molding projects too. (Kind of like Sharpie shiplap but way more legit.) The price of molding has skyrocketed lately (along with every other home improvement supply), so we figured out a way to add pricey looking batten wall molding for the fraction of the price using handy dandy lattice strips at $1.28 per linear foot. If you’ve never installed any type of molding before, it’s the perfect beginner version to try since it requires no miter cuts and lattice can sit flush right on top of your existing baseboards since they’re thinner than regular 1×2 boards. 
How to Make a Batten Wall Using Lattice StripsYou could add this vertical batten wall all around the room, as wainscoting, or just as a board and batten accent wall. You could leave your walls plain without any wall decor for a minimalist approach or layer it with art for even more character. It would be perfect for adding onto a plain kitchen island too. Keep in mind though, if you have a textured wall, the process won’t be as simple, since you will need to add these MDF panels to your textured walls using Liquid Nails and brad nails first. Supplies
Steps to Make a Batten Lattice Wall
Step 1 – Measure and Decide on a LayoutMeasure your entire wall first, decide how far apart you want your batten (vertical lattice strips) to be, and mark their placement on the wall with a pencil. Remember that lattice strips are 1 1/2″ wide, so factor that into your layout plan. We set our battens to have an 8 1/2″ gap between. Step 2 – Cut Lattice LengthMeasure the height of your wall from baseboard to crown and cut the first lattice strip to the needed length with a jigsaw. (Not all walls will be perfectly the same height all the way across, so don’t cut all of your lattice based on that first measurement.) 
Step 3 – Use a Level to Check Lattice Placement“Dry fit” the first lattice strip and use a level to make sure it’s perfectly straight. Step 4 – Nail LatticeOnce you’re happy with the lattice strip placement, nail it to the wall with the brad nailer (or a hammer). You can use construction adhesive here as well, if you choose, but because the lattice is so lightweight, it’s completely optional. (The batten wall will also be easier to remove without adhesive later if one day you change your mind.) 
Step 5 – RepeatRepeat Steps 2-4 until you’ve placed all lattice strips along the wall. 
Step 6 – Caulk Cracks and Wood Fill Nail HolesCaulk all of the edges of the lattice strips to fill all of the cracks, and fill all of the nail holes with wood filler. 
Step 7 – Sand Wood FillerOnce the wood filler is fully dry, sand smooth with fine grit sandpaper (we use an orbital sander to make the process go faster). Brush away any sanding dust after. 
Step 8 – PaintGive everything a fresh coat of paint and you’re done! (We painted the wall first with the same color we planned to use on the lattice strips so that we wouldn’t have to work around all of the details afterwards.) 
The Finished Batten WallDon’t you think these two batten walls add so much to this little breakfast nook corner? I love it so much! We added these vintage style sconces to bring more light into this windowless space. What do you think?! They work so well with this linear chandelier that adds a touch of modern, and the brass pops against that batten wall we painted Benjamin Moore Chantilly Lace. 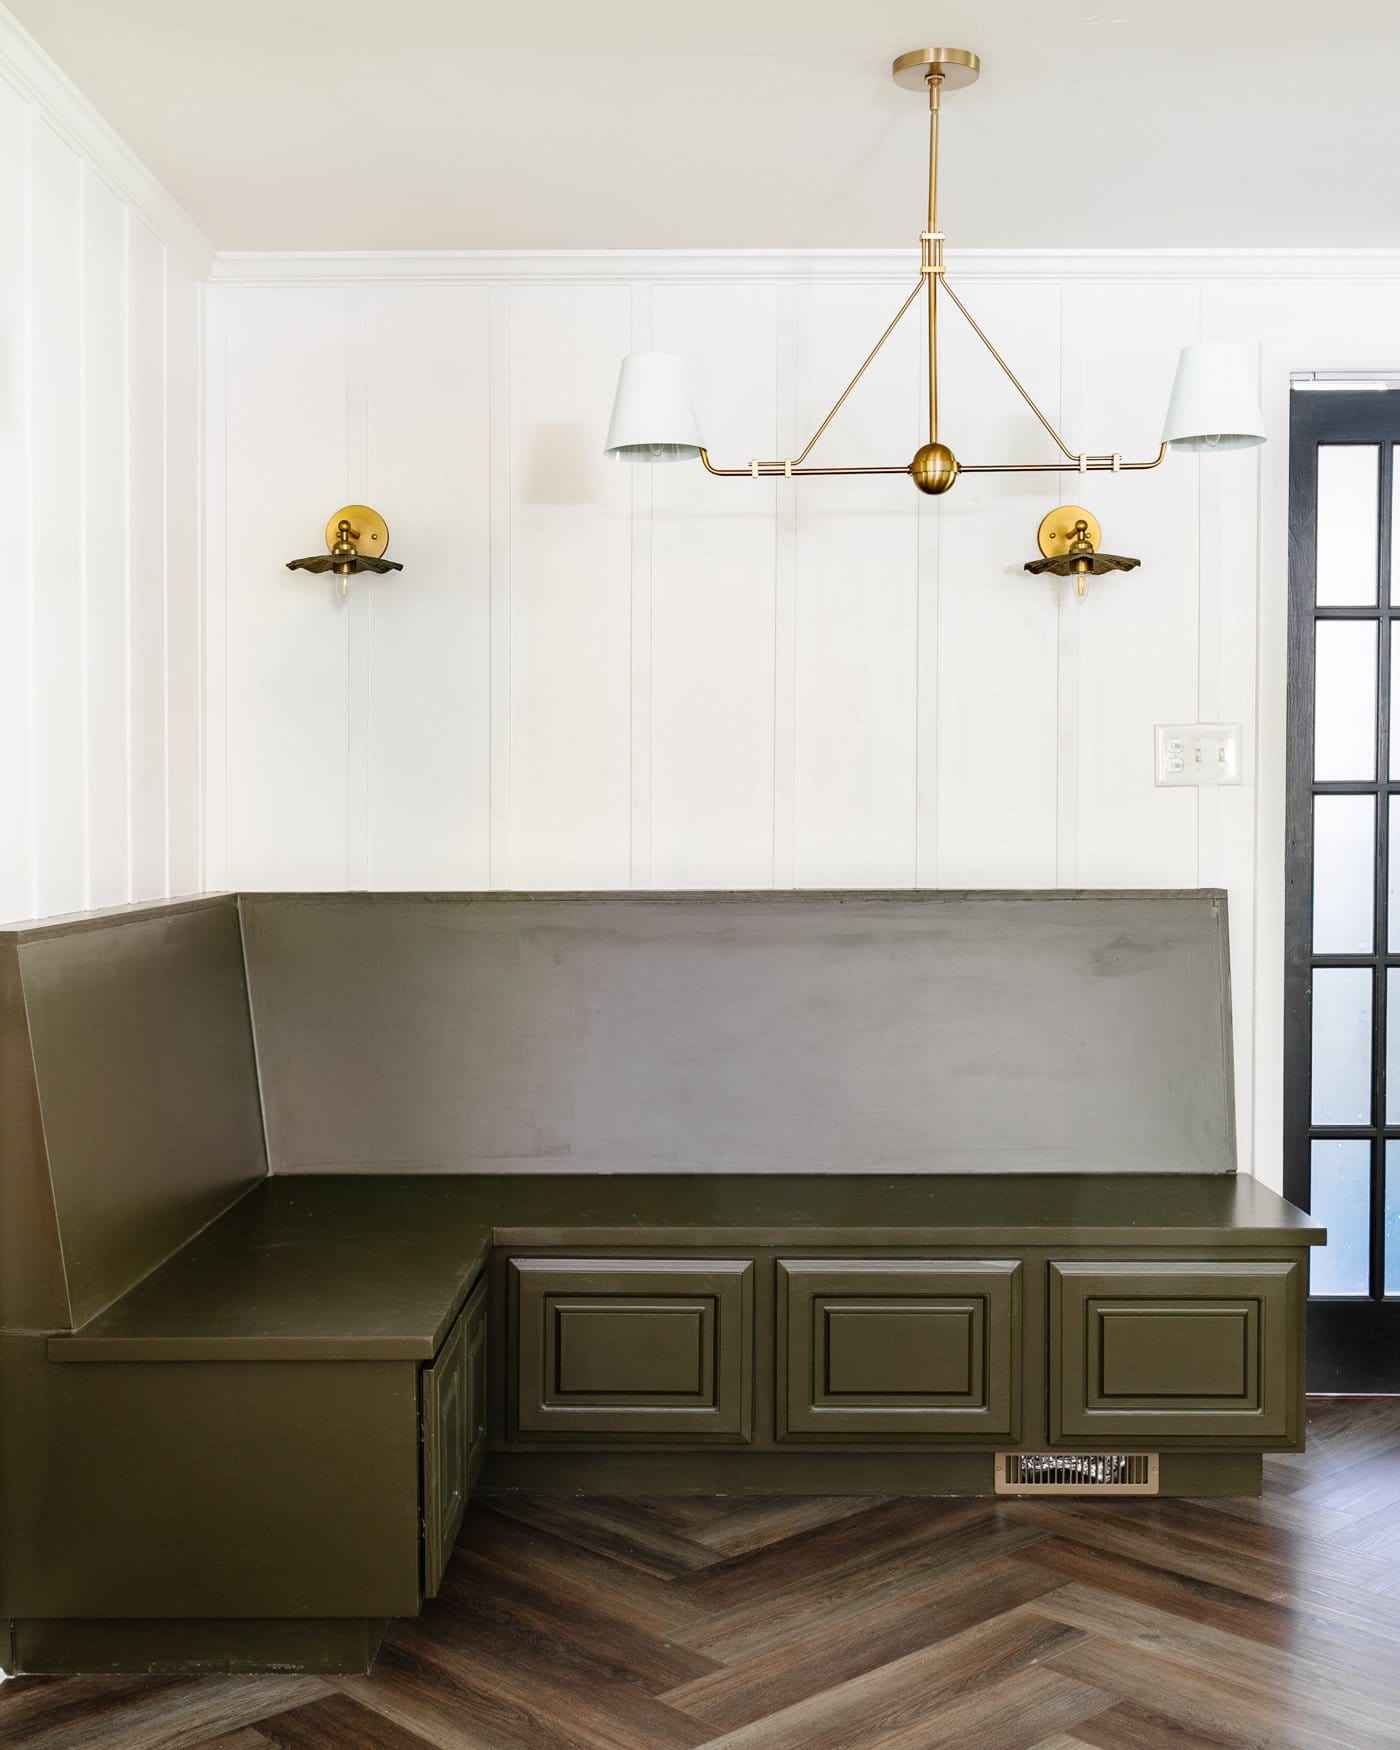
Wrapping Up Breakfast Nook DetailsI still plan to paint the air vent and add knobs to the banquette cabinet doors. (Now that it’s dry, I have to admit, don’t love the paint I had to use on the banquette thanks to supply chain issues causing my favorite cabinet paints to be sold out. But oh well. If that’s our biggest challenge, I’ll take it.) I just got the call this week that the newly reupholstered cushions are finished! So it will all be coming together in here soon. These DIY herringbone LVP floors still look absolutely amazing since we installed them a few weeks ago! Next on the list is building a table, refinishing some secondhand dining chairs for the other side, and adding some vintage art and decor finds. It will be so charming as we wrap up the final details. 
Have you ever done a DIY batten wall before? Or found a new use for lattice strips? They’re the best for so many things! More Project Ideas Using Lattice Strips
If you want more wall molding ideas, here are a few more too. More DIY Wall Molding Ideas
The post Inexpensive DIY Batten Wall Using Lattice Strips appeared first on Bless'er House. via Home Improvement Ideas for All Skill Levels https://www.blesserhouse.com/inexpensive-diy-batten-wall-using-lattice-strips/ In my new shop, I was thinking about how to store all of the shipping supplies we’ll need. Then I looked up and realized that there is a vast empty space overhead, and taking advantage of that would be pretty easy. I’m calling it a loft, but it’s pretty much just a giant shelf. Check out the video above to see how I built it. Things I Used in This Project:
If you haven’t already, don’t forget to sign up at the top of this page for my newsletter so you don’t miss new projects! (Most of the links listed above are affiliate links. As an Amazon Associate I earn from qualifying purchases. Thank you for supporting me in this way.) The post Storage Shelf for Garage or Workshop | Easy Hanging Design appeared first on Wilker Do's. via Wilker Do's https://wilkerdos.com/2022/06/storage-shelf-for-garage-or-workshop-easy-hanging-design All of the details to give a corner banquette a new look with paint, plus how to install an air vent redirect under a cabinet. Finally! After months of searching for a secondhand corner banquette on Facebook Marketplace, driving nearly 4 hours round-trip to pick it up, moving a door, installing LVP flooring, redirecting an air vent, and painting for days, we have the slight makings of breakfast nook! 
See 28 gorgeous banquette benches for all budgets here, if the secondhand route doesn’t come quite as easily.I managed to shoot the banquette’s new digs right after the electrician left from installing those sconce boxes and relocating for the linear chandelier, so forgive the dust. I’m still waiting on reupholstered cushions, but even “naked” this banquette already has us envisioning so many fun family dinners gathered around the table with many more loved ones squeezed into this little space! 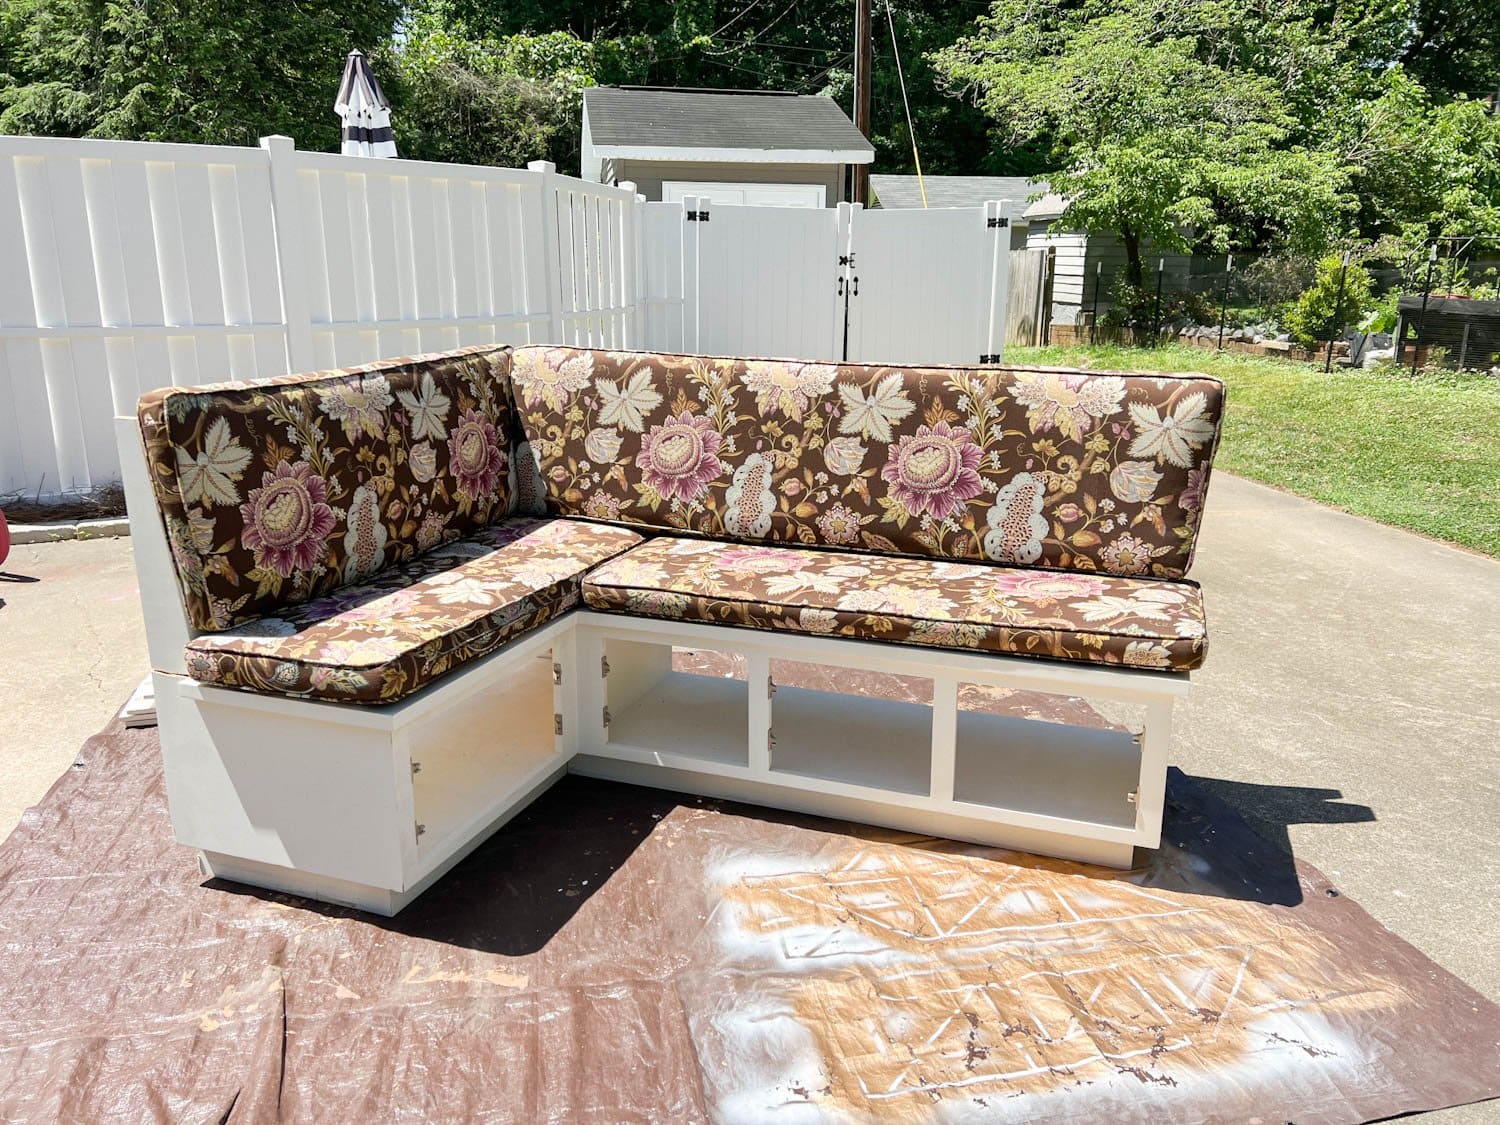
How to Redirect Air Vents Under CabinetsOne little obstacle we had to address before making the shabby corner banquette look chic was rerouting the air vent on the floor that was positioned right beneath the under seat the cabinets. (There always has to be at least one obstacle or it wouldn’t be a home improvement project, would it? Murphy’s Law every time.) If you’re ever building built-in shelves, cabinets, a window seat, or a corner banquette like ours, you absolutely can’t cover and ignore any vents; the air flow must be redirected to keep the room properly heating and cooling. 

How to Install an Air Vent RedirectWe used this air vent redirecting kit called a Toe Ductor (it works for wall registers and baseboard registers too). The kit allows you to push the air flow underneath your built-in furniture. (Not sponsored… just a cool thing we’ve discovered and used for DIYs over the years.) Make sure you allow at least 4 inches of space underneath your cabinet or built-in. We did the same underneath the built-in cabinets and window seat for our neighbors’ rec room makeover last year. In hindsight, I would paint that vent grate to blend it. 
Supplies

Step 1 – Attach Box to Floor VentCover the floor vent first with the Toe Ductor box and screw into place. 
Step 2 – Measure and Cut for the Toe Kick CoverDecide where you want to place the new air vent on your built-in, measure, and mark. Using the oscillating tool, cut out a rectangular section. 

Step 3 – Attach the New VentOn the backside of the rectangular hole you just cut, attach the new vent with screws to the toe kick. 
Step 4 – Attach Flexible DuctUse the provided metal strip to attach the flexible duct to the back of the vent. (Our metal strip put up a bit of a fight, so we reinforced it with duct tape.) 
Step 5 – Attach Flex Duct to Box and Position Cabinet/Built-In on TopStretch out the flexible duct underneath the corner banquette built-in, and attach it to the box on the floor with the kit’s metal stripping. We reinforced ours again with duct tape so no air escapes. Place the cabinet or built=in on top of the box and anchor to the wall as you’d like. You can attach the toe kick grate to the front after painting. 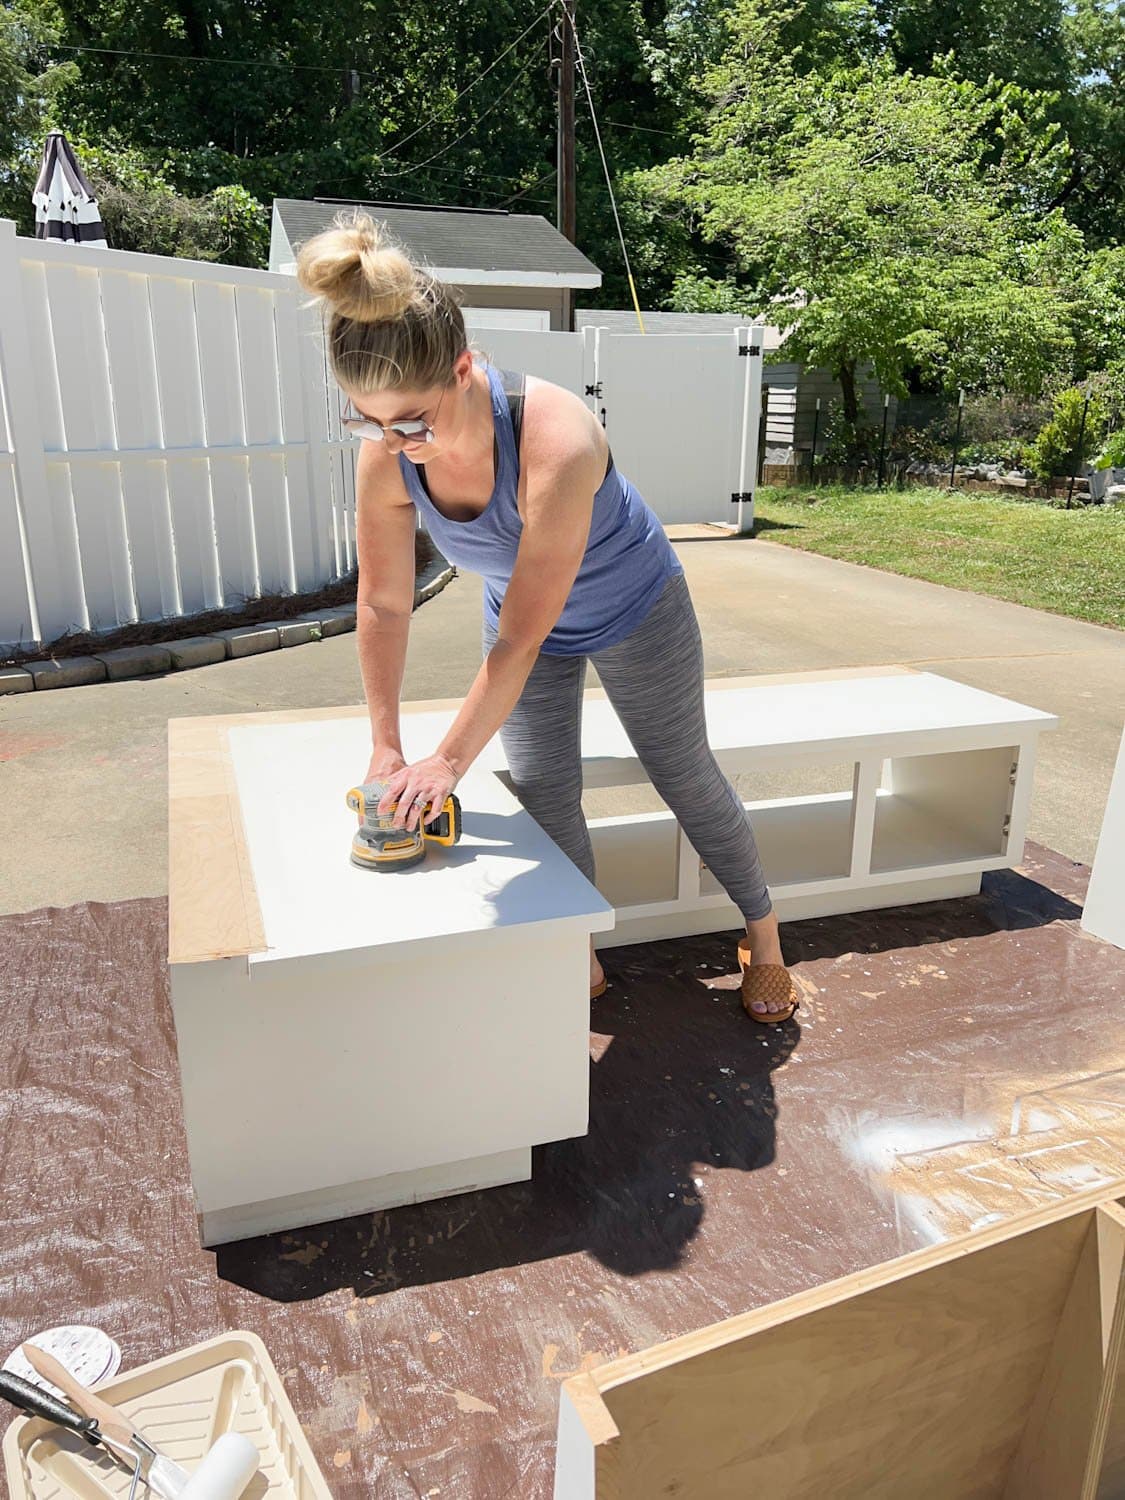
Step 6 – Prep and PaintI went through my usual cabinet painting process since this corner banquette is very much like a piece of cabinetry.

Check out that deep, desaturated olive green! It blends perfectly with our more vibrant hunter green kitchen cabinets while still feeling like a neutral. Love! The color is Benjamin Moore Southern Vines. We anchored the new-to-us corner banquette to the wall while we were at it so the kids can get rough and rowdy on this bench all they want. 

The Painted Corner BanquetteI cannot wait to see some pretty striped cushions on this bench soon, but it looks so good already! This linear chandelier is perfect for the narrow rectangular dining table that will go here soon. Because this space is windowless, and this corner feels so dark, we added sconce boxes to give it some extra help. 
I plan to go back and paint the vent cover the same Benjamin Moore Southern Vines to blend with the rest of the corner banquette so it will virtually disappear.
Are you starting to see the vision take shape in this little dining nook? Are we feelin’ the bench seating situation? We have an inexpensive wall treatment planned next to add some extra dimension that I can’t wait to show you! More Furniture Ideas
The post Corner Banquette Makeover + How to Redirect Air Vents Under Cabinets appeared first on Bless'er House. via Home Improvement Ideas for All Skill Levels https://www.blesserhouse.com/corner-banquette-makeover-how-to-redirect-air-vents-under-cabinets/ Get My Cabinet Plans Here! https://bit.ly/3NT7scz Things I Used in This Project:
If you haven’t already, don’t forget to sign up at the top of this page for my newsletter so you don’t miss new projects! (Most of the links listed above are affiliate links. As an Amazon Associate I earn from qualifying purchases. Thank you for supporting me in this way.) The post Easiest Cabinets Ever | For Shop, Garage, Kitchen or Bathroom appeared first on Wilker Do's. via Wilker Do's https://wilkerdos.com/2022/06/easiest-cabinets-ever-for-shop-garage-kitchen-or-bathroom This post is sponsored by ProCore Floors. Everything you need to know to install an LVP herringbone vinyl flooring yourself as a floating floor over tile without demo to add a durable, high-end look to your home for less. Bye bye old, beige tile and hello pretty herringbone floors! 
Our breakfast nook and our kitchen got a major flooring “glow up” this past week, and I had no idea the massive difference just flooring alone could make to fix the feature I’ve despised for so long in this space… without the need for demo! 
Everyone who has walked into our house since we finished it has said, “Woah! This floor is so cool!” Why Choose Luxury Vinyl Plank FlooringThe herringbone pattern completely makes these rooms, and the luxury vinyl plank floor is much more durable and more cushioned under our feet than our original 60+ year-old hardwood floors. It most definitely is warmer than our freezing cold tile was. Because our breakfast nook and kitchen gets the most daily traffic and connects all of the other rooms of our downstairs, I wanted it to echo our home’s traditional style with the function of modern technology, so we chose the Brookewood Herringbone Luxury Vinyl Plank waterproof interlocking flooring from the two ProCore Floors colors at Lowe’s. (You can see them in person at your local store.) For a slightly more modern, Scandinavian vibe, the lighter Ashewood color is beautiful too. I love that these floors have a slight texture to create an even more convincing look of real wood planks. 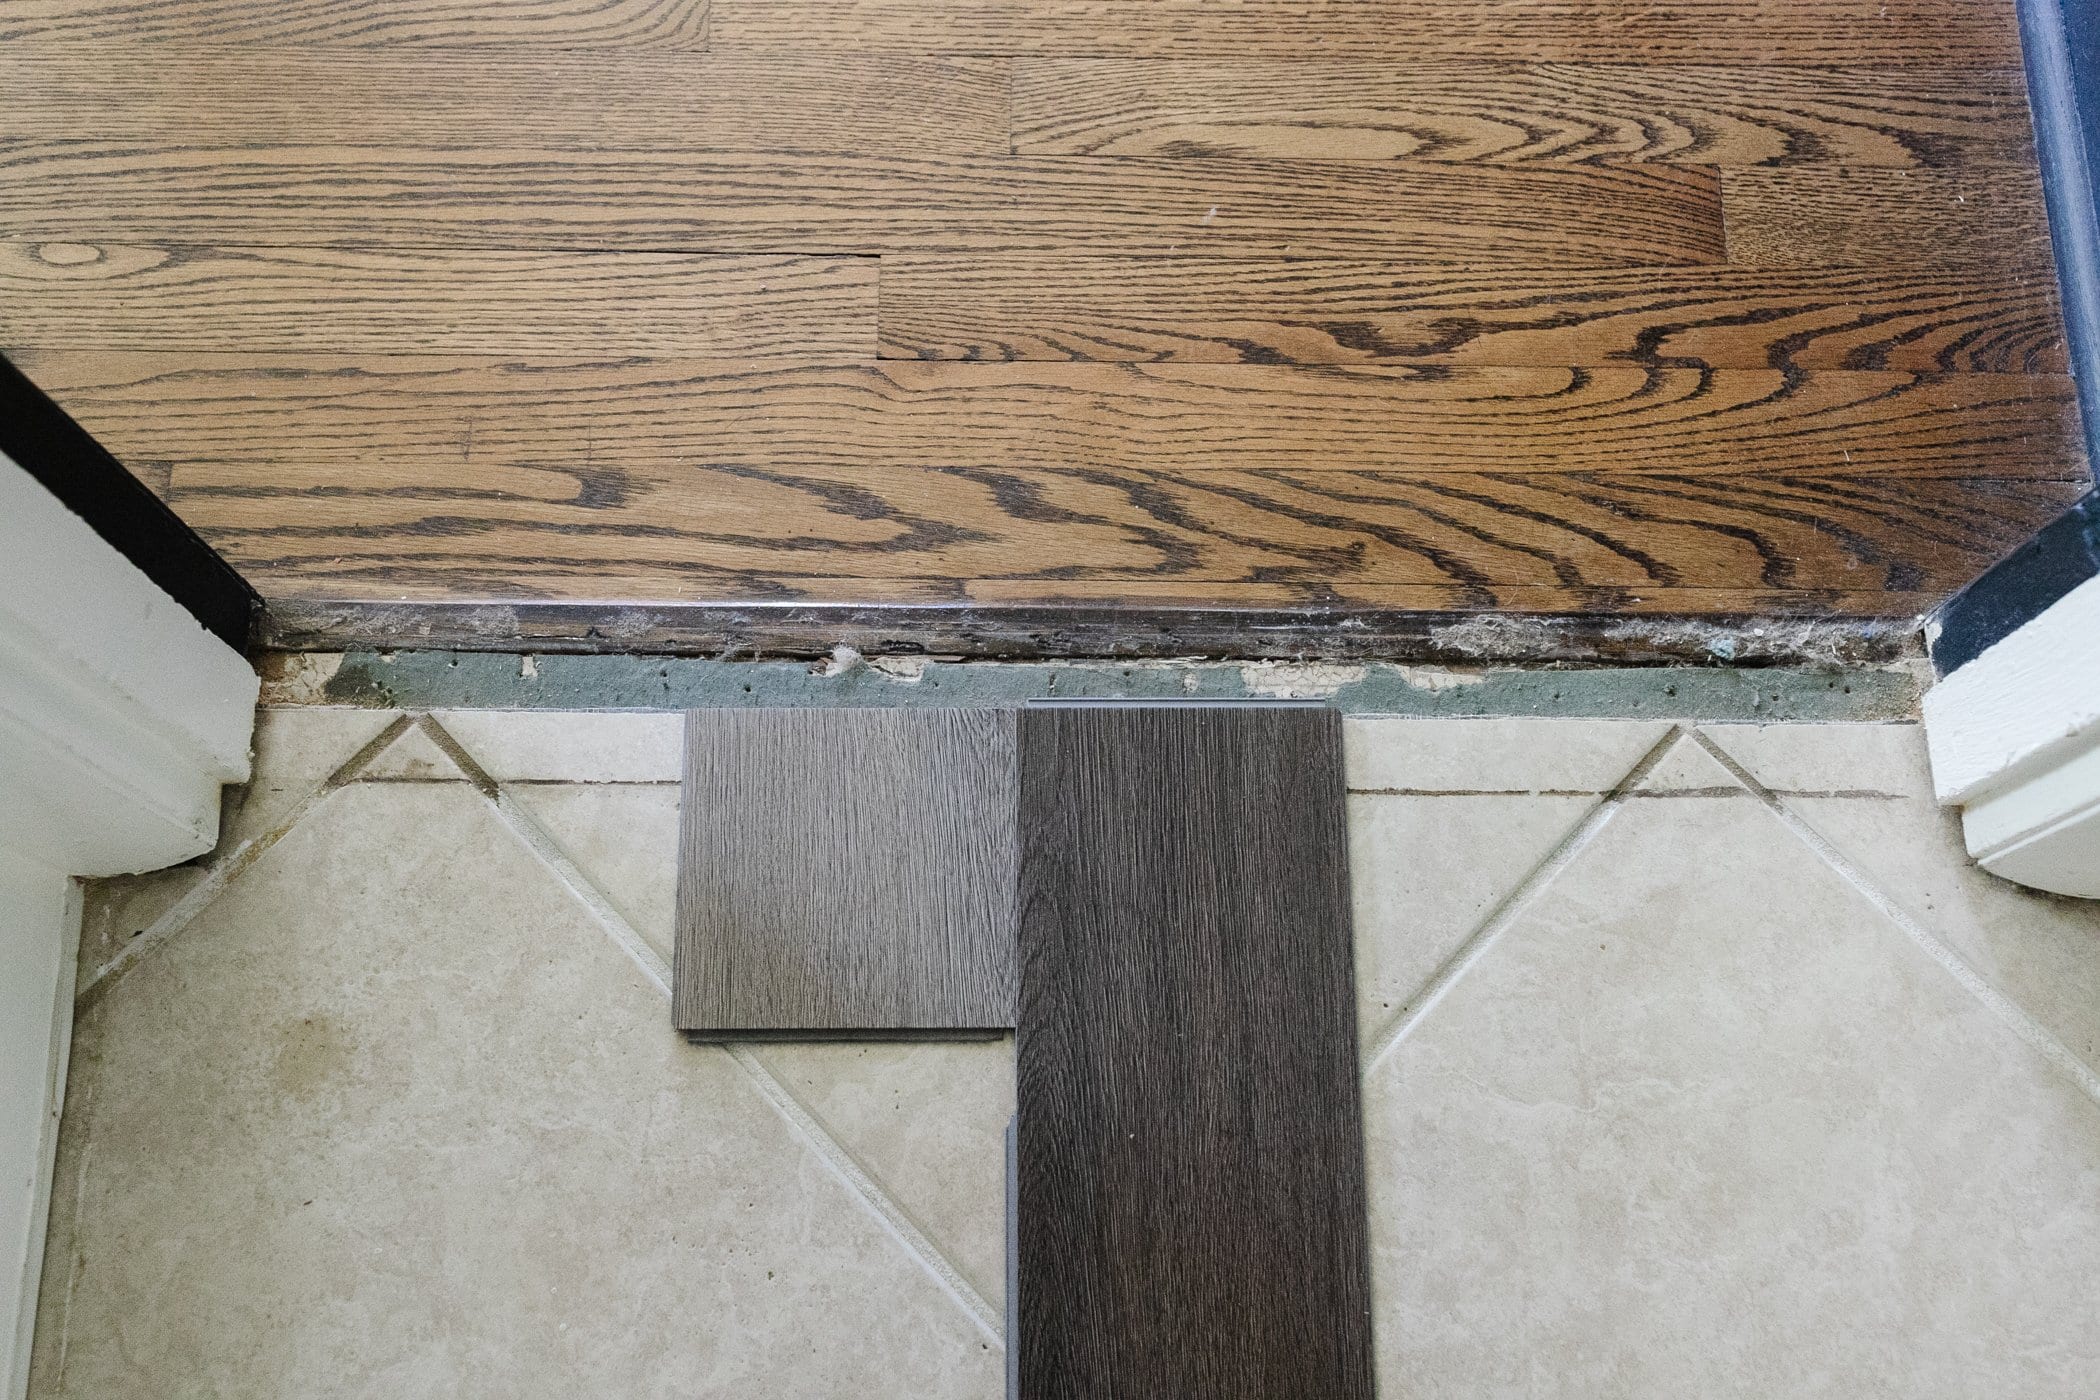
The Benefits of an LVP Floating Floor vs Tile or HardwoodWe have used ProCore Floors before in our neighbors’ house when we installed it ourselves in their playroom for their 9 kids. And because we were so happy with its durability and ease of installation, we felt completely confident about using it in our kitchen area. LVP Flooring Benefits:
You can see how we installed regular luxury vinyl plank from ProCore Floors in our neighbors’ playroom here. It’s been over a year and, despite 9 kids and a dog constantly running all over it, the floor has held up perfectly! So I was beyond excited when I found out about this herringbone vinyl floor option! 
What is a Floating Floor?A floating floor is an interlocking system similar to a puzzle where the locking floor materials create a tight bond without the need for glue or nails to attach it to a subfloor. Luxury vinyl plank flooring uses a tongue and groove or “click lock” system to snap planks together making it easy to install yourself. 
When to Install a Floating Floor Over TileNormally, I would not suggest a floating floor over tile if you were hiring out a large room remodel. But when you need a DIY flooring solution or are faced with budget/time constraints that make removing an old tile floor impossible, it’s a fantastic solution to add an upgrade in place of an eyesore. However, not all LVP floors are created alike, so it’s important to use a flooring like this one from the ProCore Plus rigid core line that have a built-in cork underlayment rigid enough to be used as a floating floor over an old floor. ***When installing luxury vinyl flooring over tile, your tile should be debris-free and without cracks, holes, or raised texture. 
Where You Can Install LVP Floating Floor:
How to Install Herringbone LVP Floating Floor Over TileSupplies
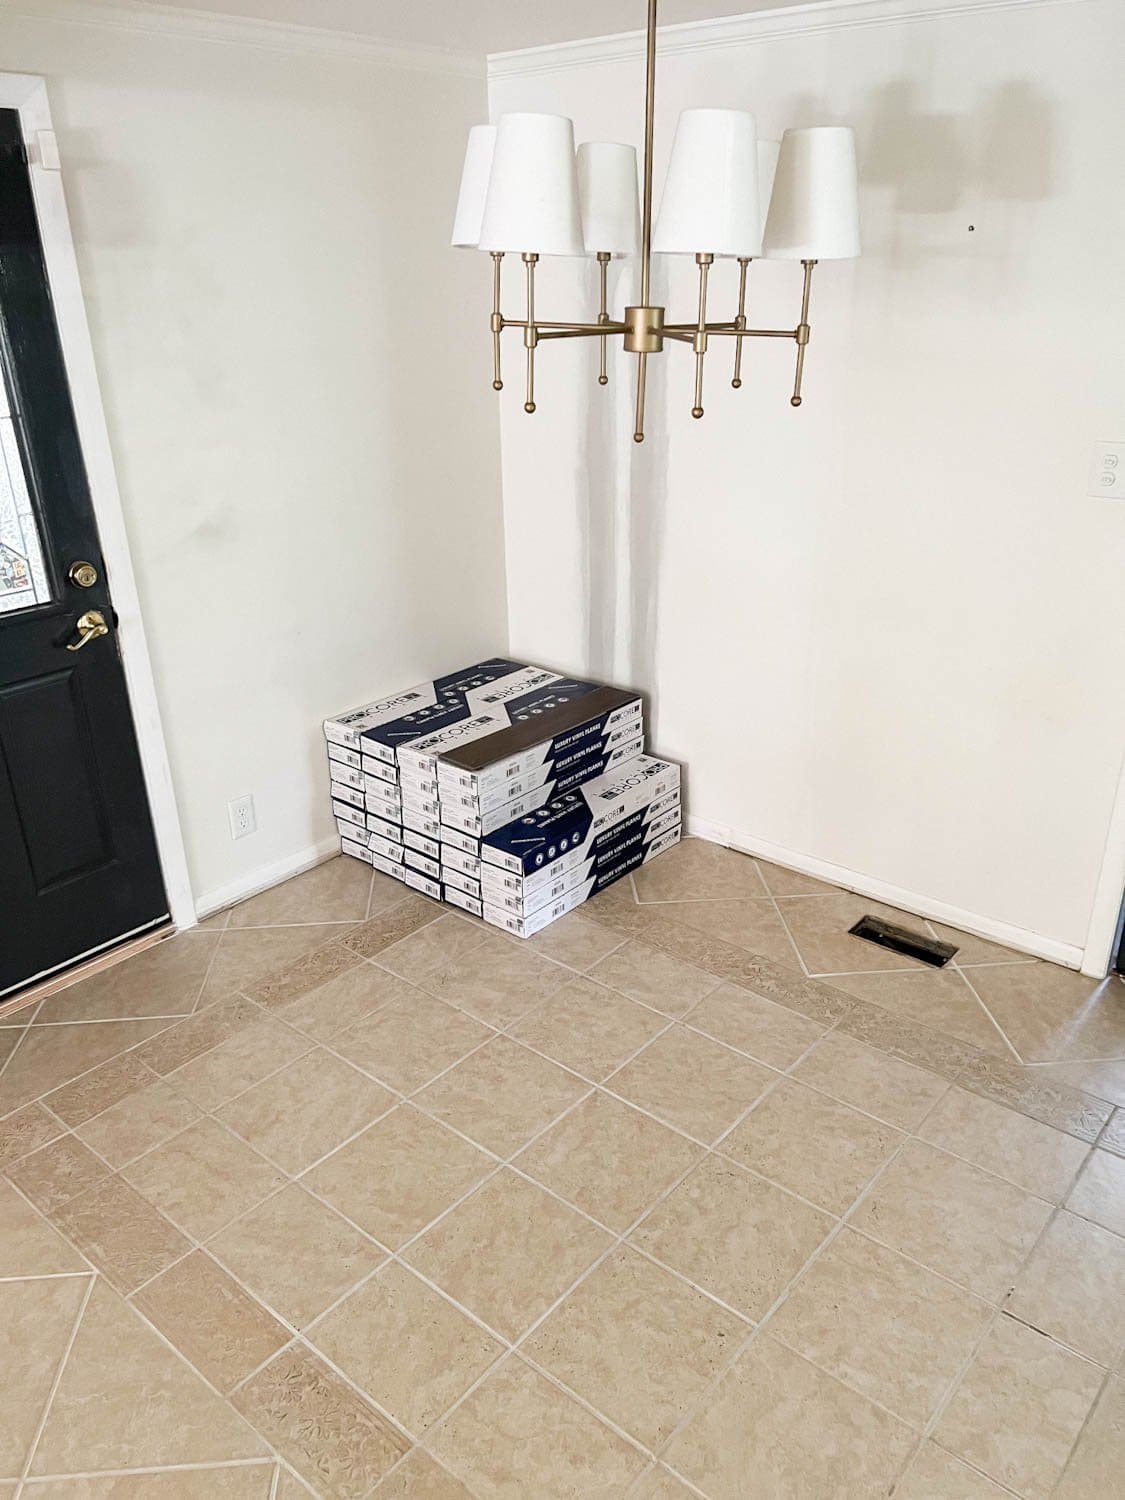
Floating Floor Installation Method StepsStep 1 Prep the spaceRemove any shoe molding in the room before you start installation. Score the caulk line on shoe molding with a utility knife, gently pry them off the wall with a pry bar, and set aside. You can put them back after installation so you don’t have to buy new shoe molding. 
Step 2 Undercut Door JambsUse an oscillating multi-tool to cut them to the height of your LVP flooring so the planks can slide underneath them. 
Step 3 Mark Your Starting LineStarting on a clean, debris-free surface, decide on your layout first by choosing which direction you want your herringbone pattern. Measure your space and mark the very center of the room. 
Then, using a chalkline or straight edge and pencil, mark the very center line of the space. 
Step 4 Mark A Second LineAfter marking your center line, mark a second line 2 inches over from your center line. This will be your guide for your first row of herringbone planks. 
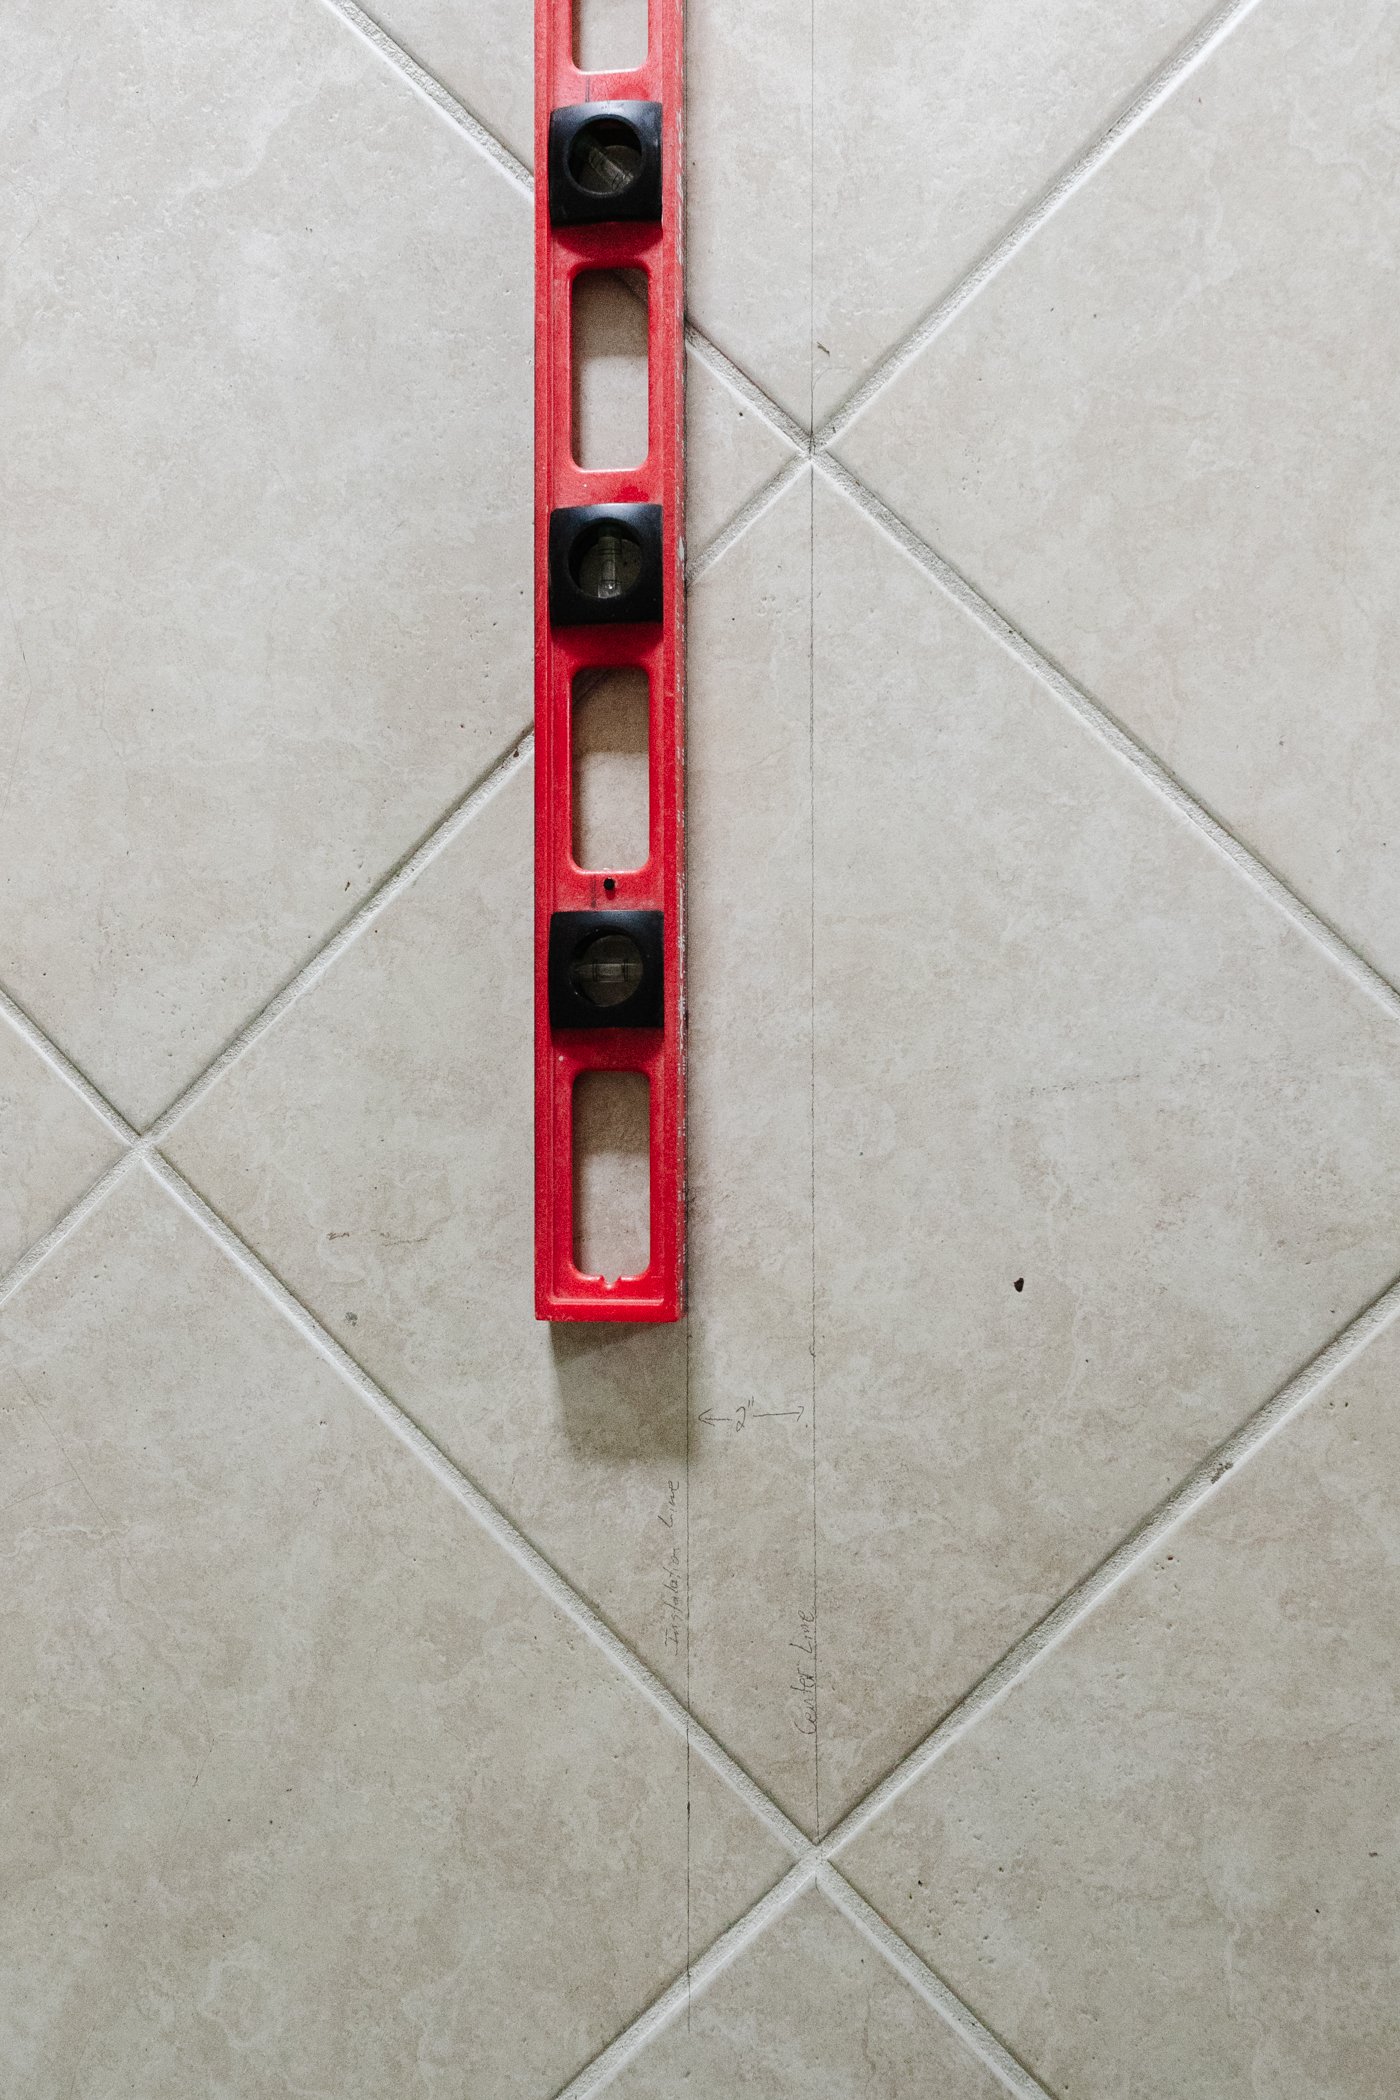
Step 5 Begin Placing PlanksClick together your first few planks, keeping the V-shape of the herringbone pattern in line with your markings. 
Step 6 Click Seams TogetherUse a rubber mallet and scrap piece of flooring (not a tapping block) to push planks together into a snug fit at the seams. Step 7 Lock SeamsThen, lock the planks together by tapping the top of the seams with a rubber mallet. 

Step 8 Vary Plank Patterns and ShadesAs you lay planks, make sure you aren’t placing two matching ones side-by-side with the same pattern and shade. Pull planks from several boxes and place them into stacks. Pay attention to the planks you’re grabbing as you work to make sure none near each other look the same for a more natural variance. 
Step 9 RepeatRepeat the process of laying, clicking together, and locking full planks throughout the middle of the room. 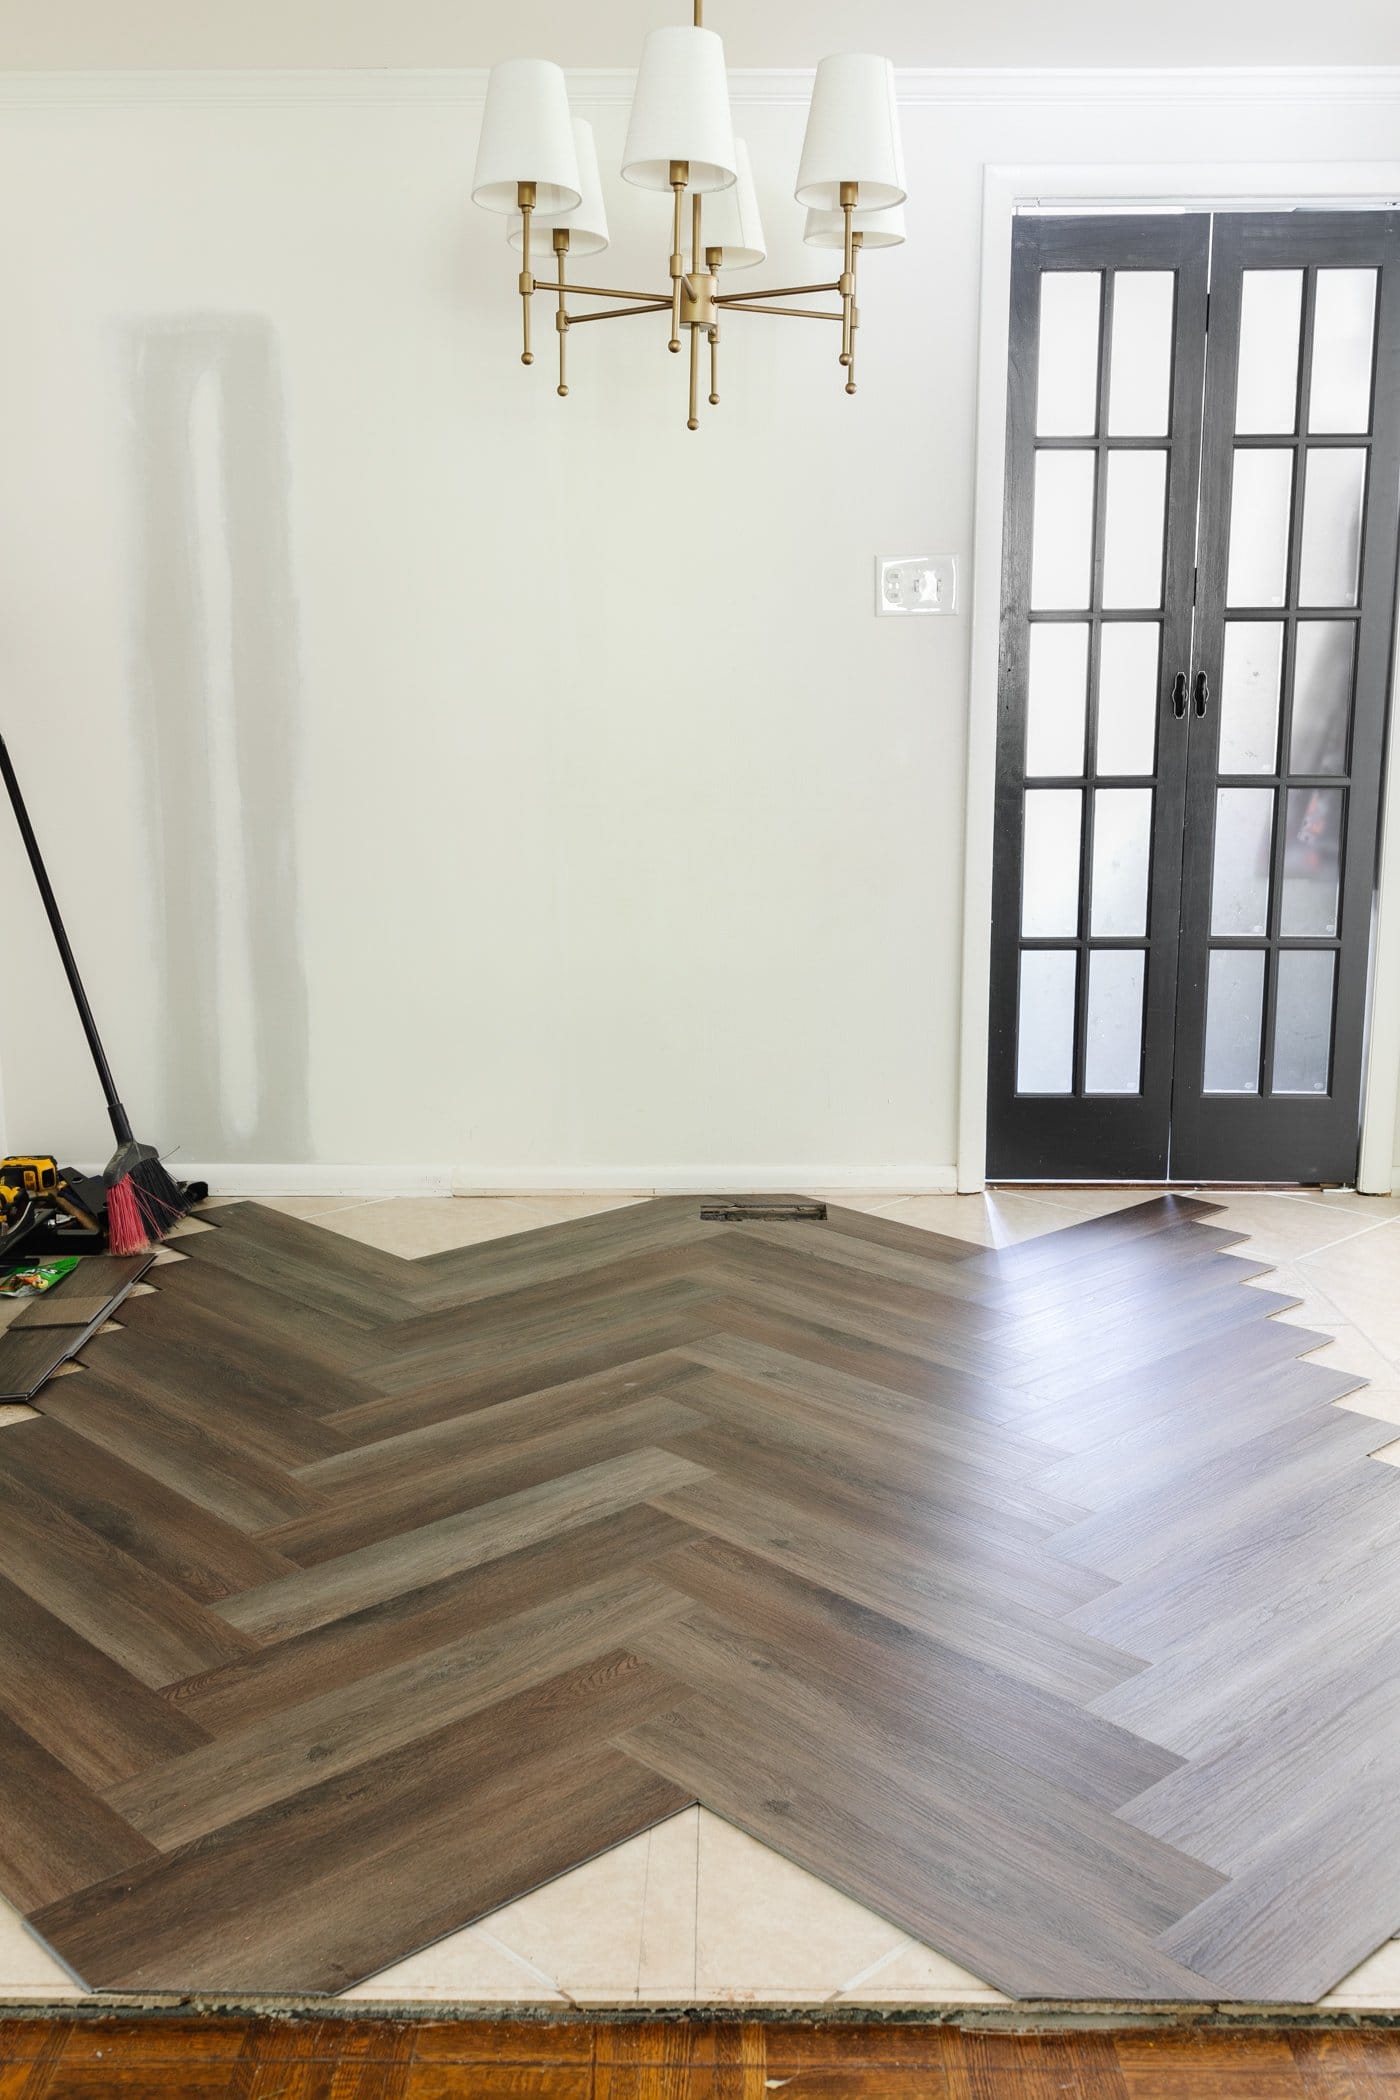
Step 10 Begin Filling In Edges and CornersAs you finish filling in the middle of the room with planks, begin measuring and cutting pieces to fill edges and corners. This is the part that is much more challenging installing herringbone LVP versus the regular planks, but the end result is so worth it. 
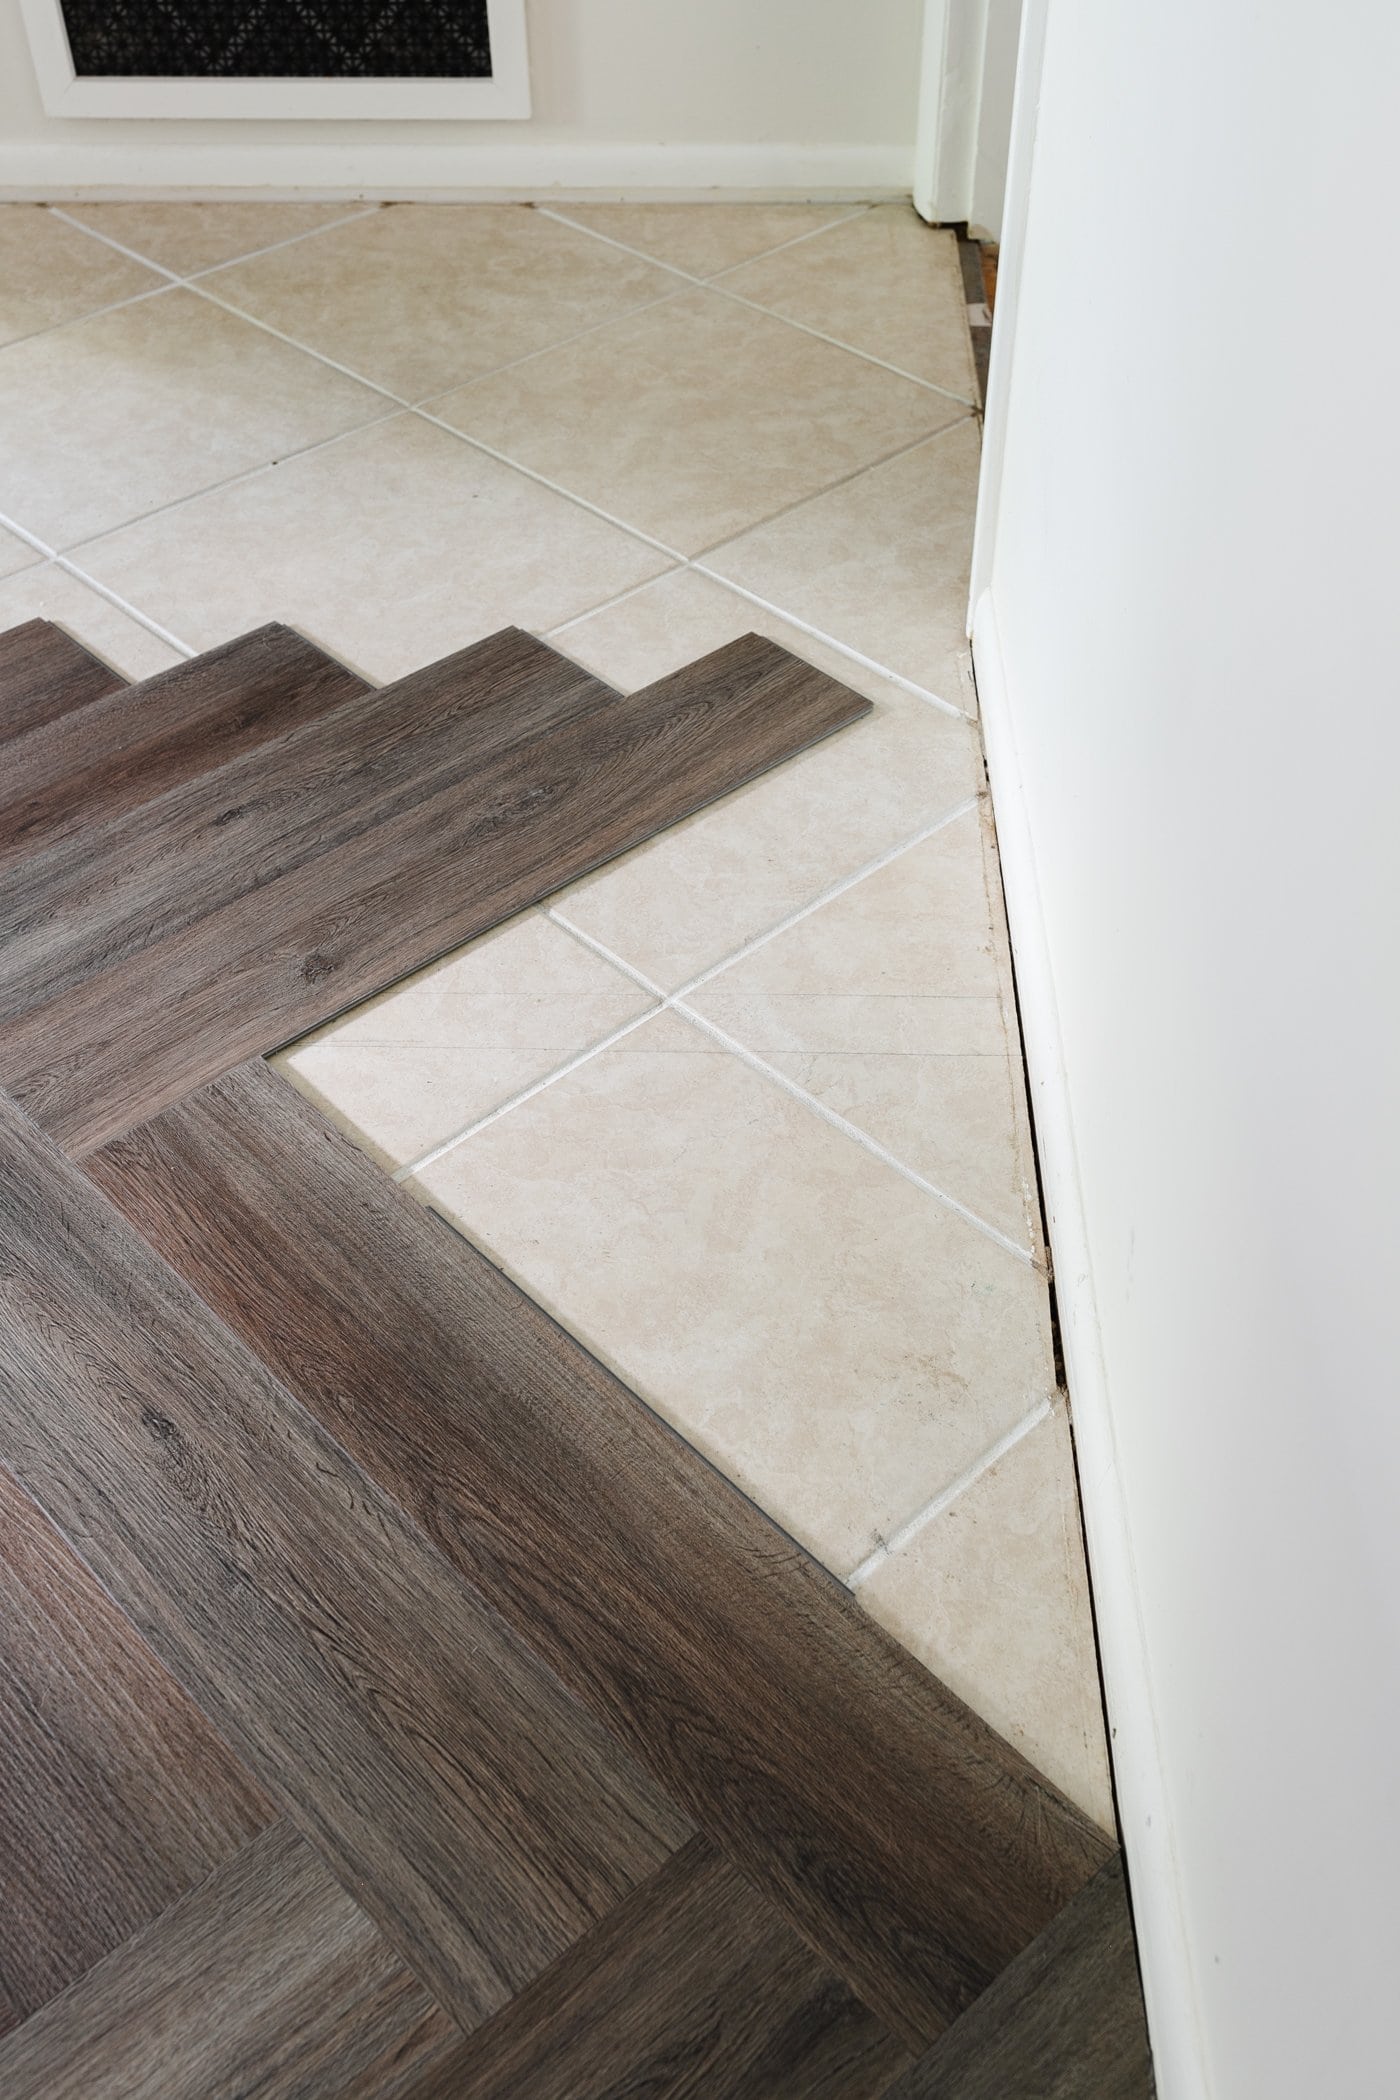
Step 11 Measure EdgesUse a tape measure to find the distance between a wall and a plank. 
Step 12 Mark Plank WidthUse a spacer cut from a plank to mark the width. Measure that new line. 
Step 13 Mark the Plank for CuttingUse the measurements from Steps 11 and 12 to mark a new plank. 
Step 14 Cut the PlankUse a jigsaw to cut the plank where you marked the measurements on it in Step 13. 


Step 15 Fill in the Rest of the RoomContinue filling all edges and corners by measuring and cutting planks as well as working around any obstacles like floor vents using the same method. 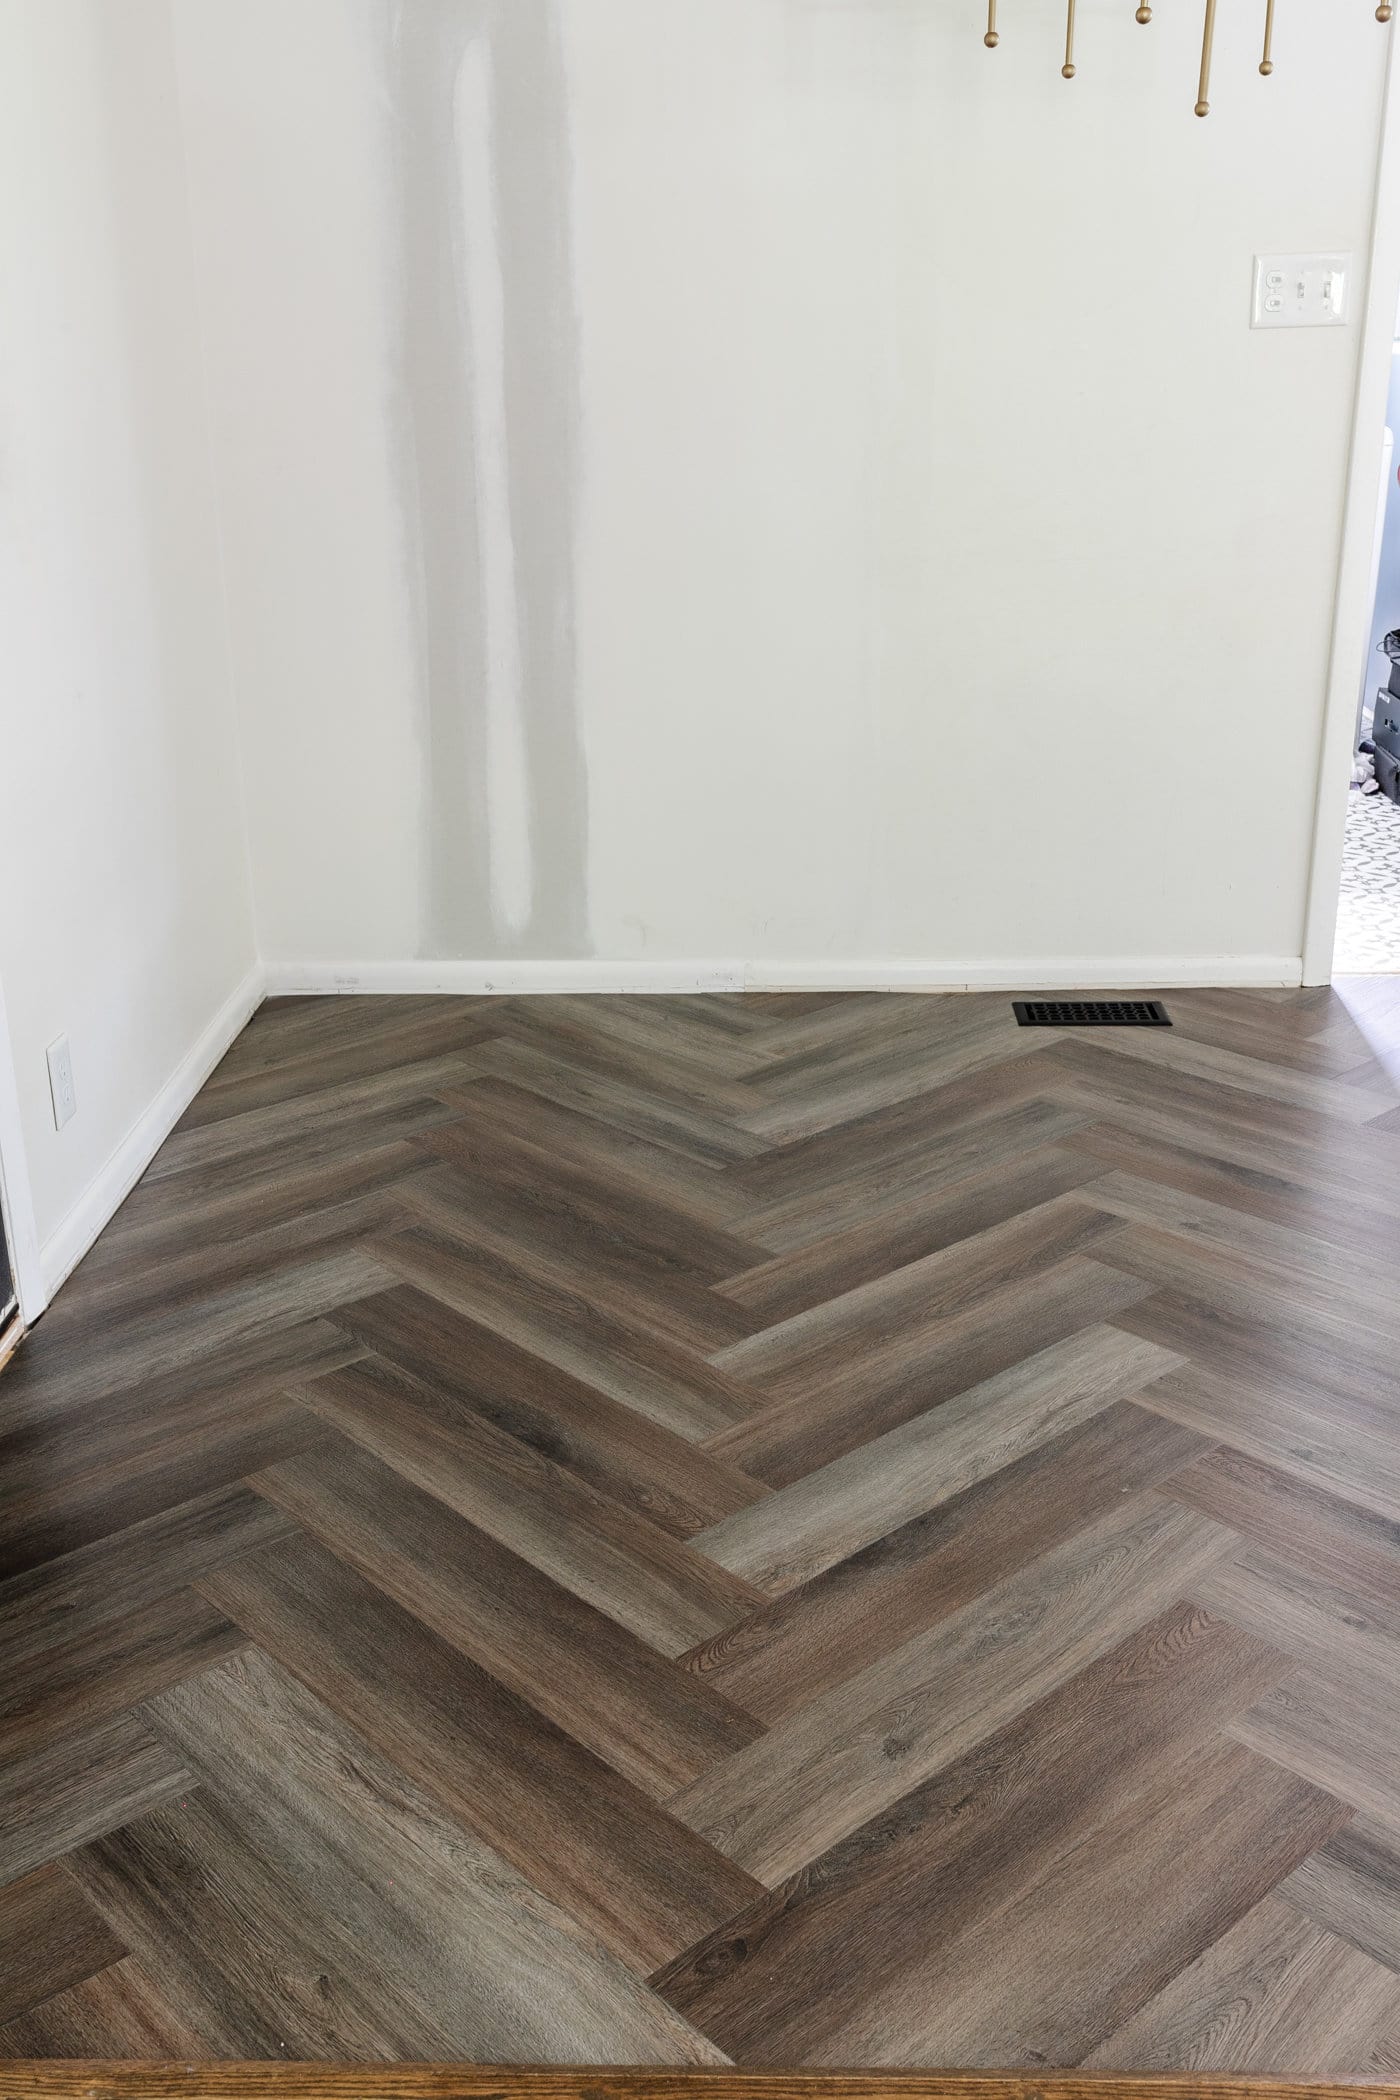
Step 16 Attach Transition StripsIn any doorways, snap transition strips into place for a clean transition between rooms. Step 17 Attach Shoe MoldingOnce all flooring is installed, reattach shoe molding onto baseboards to cover any rough cut edges in the floor’s perimeter. Use a finish nailer or hammer and brad nails to reattach shoe molding. Then, caulk and paint. 
The Finished Herringbone LVP Floating FloorDoesn’t it look a million times better than that old beige tile?! It feels like a brand new room with beautiful contrast now! That herringbone vinyl floor kicks it up a notch from the regular version. And since it’s water resistant, I don’t ever have to worry about spills or a leaky dishwasher. I really can’t believe it took us this long to make this change, and now I’m wondering why we didn’t tackle this project earlier. I love it so much! 

We still have a lot more work to do in this breakfast nook like a banquette makeover and installation, chandelier replacement, table build, wall treatment addition… it’s going to be quite a journey. But I can just see it in my head, and it’s absolutely gorgeous now that the old tile is outta here (or at least out of sight). What do you think about the herringbone LVP floor decision? It was quite a bit more work than the regular LVP floating floor, but it totally paid off in my book. More Flooring Ideas
The post How to Install a Herringbone LVP Floating Floor Over Tile appeared first on Bless'er House. via Home Improvement Ideas for All Skill Levels https://www.blesserhouse.com/how-to-install-a-herringbone-lvp-floating-floor-over-tile/ Welcome back to the new shop build series! So far, I have done demo, roughed in for a toilet and then added new wiring for walls and the ceiling lights. And this week, I’m covering the spray foam insulation portion of the build. Check out the video above! Check out the other videos in my Shop Renovation Series:
Things I Used in This Project:
If you haven’t already, don’t forget to sign up at the top of this page for my newsletter so you don’t miss new projects! (Most of the links listed above are affiliate links. As an Amazon Associate I earn from qualifying purchases. Thank you for supporting me in this way.) The post Insulating my New Shop | All About Spray Foam appeared first on Wilker Do's. via Wilker Do's https://wilkerdos.com/2022/06/insulating-my-new-shop-all-about-spray-foam |
Social Media:
Other Blogs: Kennesaw Garage Door Repair's Blog Tumblr Medium Other Profiles: Gravatar Diigo Evernote GetPocket OneNote IFTTT About.me Instapaper Disqus Nimbusweb.me Archives
April 2023
Categories |

 RSS Feed
